

7 Ways to Remove Hair Dye Stains From Tint Bowls
Table of Contents
- Why Hair Dye Stains Stick to Tint Bowls
- Method 1: Hydrogen Peroxide and Baking Soda Paste
- Method 2: Rubbing Alcohol for Stubborn Stains
- Method 3: Abrasive Cleaners (Use With Caution)
- Method 4: Micellar Water and Makeup Remover
- Method 5: How to Clean Professional Hair Tint Brushes
- Method 6: Best Stain-Resistant Tint Bowls for Salons
- Method 7: Preventing Hair Dye Stains on Salon Tools
- Frequently Asked Questions
Last Updated: September 19, 2026
Why Hair Dye Stains Stick to Tint Bowls
Hair dye stains stick to tint bowls because permanent color contains dye molecules and oxidizing agents that bond with the surface of the bowl. Plastic is porous, so pigment settles into tiny gaps and sets. Once that bond forms, a quick rinse won't lift it.

This guide covers seven ways to remove hair dye stains from tint bowls, from gentle pastes to solvent-based methods. We'll also show you how to prevent buildup in the first place.
Here's the core problem most colorists run into: the longer dye sits, the harder it is to remove. Fresh color wipes away fast. Color left overnight can stain a bowl for good.
Tint bowls are the small mixing vessels you use to blend and apply hair color. Their material matters more than most people think.
Glass bowls resist staining but chip easily. Plastic bowls are light and cheap, but porous. Silicone bowls flex and clean up well, though they can hold onto pigment over time.
Hair color residue, pigment saturation, and residue buildup all come down to one thing: how fast you clean. Let's walk through each method, starting with the gentlest.
Method 1: Hydrogen Peroxide and Baking Soda Paste
Hydrogen peroxide and baking soda make the safest stain-removal paste for most tint bowls. Mix two parts baking soda with one part peroxide until you get a thick paste. Apply it, let it sit, then rinse thoroughly.
Here's how to do it step by step:
- Put on gloves and open a window for ventilation
- Mix 2 tablespoons baking soda with 1 tablespoon hydrogen peroxide
- Stir into a paste consistency, like toothpaste
- Spread a thick layer over the stained areas
- Let it dwell for 10 to 15 minutes
- Scrub gently with a non-abrasive cloth
- Rinse thoroughly with warm water
The chemical reaction lifts pigment without harsh scrubbing. That protects your bowl's surface integrity.
This method works best on light stains and fresh residue. For deep, set-in color, you may need something stronger.
Method 2: Rubbing Alcohol for Stubborn Stains
Rubbing alcohol is the go-to solvent for stubborn dye stains on non-porous bowls. Its high alcohol content breaks down pigment fast. Soak a cloth, wipe, and watch the color lift.
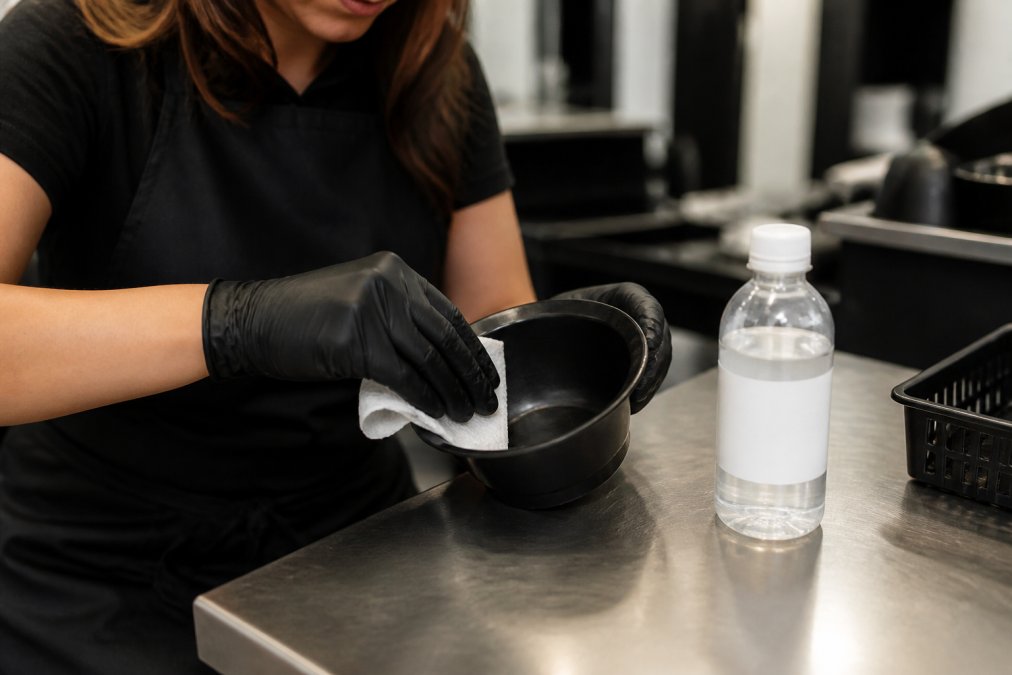
Follow these steps:
- Soak a non-abrasive cloth in 70% isopropyl alcohol
- Press it against the stain for 30 seconds
- Wipe in one direction, not circles
- Repeat until the color stops transferring
- Wash with dish soap and warm water
Isopropyl alcohol works on plastic and glass alike. It evaporates quickly, so there's no residue left behind.
A common mistake is drenching the bowl. You only need a damp cloth. Too much liquid can spread pigment into clean areas.
For heavy buildup, let the alcohol sit for a minute before wiping. Dwell time makes a real difference.
Method 3: Abrasive Cleaners (Use With Caution)
Abrasive cleaners remove tough stains, but they can scratch your bowls. Scratches create more porous surfaces, which trap more dye next time. Use them only as a last resort, and only on the right material.
Not all abrasives are equal.
| Abrasive | Typical Form | Safe On | Risk |
|---|---|---|---|
| Baking soda (dry) | Fine powder | Glass, silicone, hard plastic | Low |
| Whitening toothpaste | Soft paste | Glass, silicone | Low |
| Bar Keepers Friend | Oxalic acid powder | Glass, stainless steel | Medium, can dull plastic |
| Comet or Ajax | Chlorinated powder | Glass only | High, etches plastic |
| Steel wool (0000) | Fine metal pad | Glass only | High, shreds plastic and silicone |
| Pumice stone | Porous block | Glass only | Very high, permanent scratching |
If you must use an abrasive, follow this order:
- Start with dry baking soda on a damp cloth, it's the mildest option
- Work in small circles with light pressure for 30 seconds
- Rinse and check the stain under bright light
- Step up to a stronger abrasive only if the stain hasn't budged
- Never use steel wool or pumice on plastic or silicone
- Rinse and inspect for scratches after every pass
Silicone is a special case. It's flexible and won't crack, but abrasive powders embed in the surface and leave a chalky residue that's hard to rinse out. Stick to alcohol or micellar water on silicone.
Method 4: Micellar Water and Makeup Remover
Micellar water and makeup remover lift dye from tint bowls thanks to mild surfactants. They're gentle enough for daily use and safe on most synthetic materials. This is the method to reach for when you want zero risk of damage.
How to use it:
- Saturate a cotton pad or soft cloth
- Press it onto the stain for 20 seconds
- Wipe away the loosened color
- Follow with warm soapy water
- Dry with a lint-free towel
Method 5: How to Clean Professional Hair Tint Brushes
Cleaning professional hair tint brushes follows the same logic as bowls, but the bristles need more care. Soak the bristles only, never the handle, in warm soapy water. Then comb through and air dry flat.
Here's the full routine:
- Wipe excess color off the bristles immediately after use
- Soak bristles in warm water with a drop of dish soap
- Work the soap through with your fingers
- Rinse until the water runs clear
- Reshape the bristles with your fingers
- Lay the brush flat to dry, never upright
Method 6: Best Stain-Resistant Tint Bowls for Salons
The best stain-resistant tint bowls for salons are made from non-porous materials that resist pigment bonding. But "non-porous" means different things across plastic, silicone, and glass, and each material needs a different care routine to stay stain-free long term.
Here's how the three main materials compare:
| Material | Stain Resistance | Break Risk | Best Cleaning Method | Lifespan With Care |
|---|---|---|---|---|
| Professional-grade plastic (polypropylene) | Moderate, porous over time | Low | Rubbing alcohol, peroxide paste | 6-12 months |
| Silicone | High, non-porous, flexible | Very low | Micellar water, mild soap | 1-2 years |
| Tempered glass | Very high, fully non-porous | High, chips and shatters | Baking soda paste, alcohol | 2+ years, if not dropped |
Long-Term Maintenance Schedule
- After every client: Rinse with warm water within 5 minutes. Wipe with a damp cloth.
- End of each day: Wash with dish soap and warm water. Dry completely before stacking.
- Weekly: Deep clean with rubbing alcohol or a peroxide-baking soda paste. Inspect for scratches.
- Monthly: Check for surface dulling. If a plastic bowl looks cloudy, it's about to start holding stains, replace it.
- Quarterly: Replace any bowl with visible scratches, regardless of how clean it looks.
For studios moving between locations, pack bowls with a towel between them. This prevents scratches during transport, since scratches are where stains start. Silicone bowls handle transport best; glass bowls should stay at the station.
Method 7: Preventing Hair Dye Stains on Salon Tools
Preventing hair dye stains on salon tools comes down to speed and habits. Rinse every bowl and brush the moment you finish. Dried color is the enemy.
Build these habits into your routine:
- Rinse bowls immediately after each client
- Never let color sit overnight
- Wipe brushes before they dry
- Keep a spray bottle of alcohol at your station
- Deep clean all tools once a week
- Store bowls stacked, not nested, so air circulates
Frequently Asked Questions
Will Dawn dish soap remove hair dye stains from tint bowls?
Dawn dish soap can lift fresh dye residue from tint bowls, but it rarely removes set-in stains from porous plastic. For best results, rinse the bowl immediately after use with warm water and dish soap. If a stain remains, follow with rubbing alcohol or a hydrogen peroxide paste. Dish soap works as a first step, not a standalone fix for older discoloration on salon tools.
Can rubbing alcohol remove hair dye stains from salon tools?
Yes. Rubbing alcohol acts as a solvent that breaks down many dye molecules on non-porous surfaces. Apply 70% isopropyl alcohol to a non-abrasive cloth and wipe the stained area, letting it dwell for 30 seconds before scrubbing gently. Test on an inconspicuous spot first, since alcohol can dull certain finishes. It works well on tint bowls, tint brushes, and color applicator bottles.
Is it possible to prevent hair dye staining on tint bowls?
Prevention is far easier than removal. Rinse bowls immediately after each service before dye dries, and avoid letting color sit overnight. Using stain-resistant tint bowls made from non-porous materials, like the ESTL+CO Hair Color Bowls ($19.00 for two), dramatically reduces residue buildup. A consistent maintenance routine that includes immediate rinsing and weekly deep cleaning keeps bowls looking new for months.
What is the best professional cleaner for hair color tint bowls?
There is no single best cleaner, because the right choice depends on the stain and the bowl material. For everyday cleaning, warm water and dish soap handle most fresh dye. For stubborn stains, a hydrogen peroxide and baking soda paste or 70% isopropyl alcohol works well. Always spot test on an inconspicuous area first, and avoid abrasive cleaners on porous plastic to protect surface integrity.
Stubborn dye stains are a daily reality in any busy color studio, but they don't have to cost you time or tools. ESTL+CO builds stain-resistant tint bowls and ergonomic feathered brushes designed by pros, for pros, so cleanup stays fast and your workflow stays smooth. With a U-shaped brush cutout, a tilted edge that holds product, and two bowls per box, the right equipment makes prevention the easy path. Get started with ESTL+CO and keep your studio running at full precision.