

Balayage Placement Techniques for Face Framing
Table of Contents
- Understanding Balayage Placement Techniques for Face Framing
- Face Framing Balayage Sectioning Patterns and Hair Parting
- Freehand Painting vs. Foil Placement for Precision
- Choosing the Right Developer Strength and Lightener
- Best Tools for Balayage and Foil Techniques
- How to Blend Face Frame Highlights for Natural Dimension
- Processing Time, Visual Checks, and Hair Health
- Troubleshooting Common Balayage Placement Mistakes
- Frequently Asked Questions
Last Updated: September 30, 2026
Understanding Balayage Placement Techniques for Face Framing
Balayage placement techniques for face framing require precision and strategic sectioning to create dimension where it matters most, relying on freehand control rather than traditional foil highlights.
The difference between stunning face-framing balayage and flat, uneven results comes down to three core decisions: sectioning strategy, freehand versus foil placement, and lightener application intensity near the hairline.
Face-framing balayage creates contrast that flatters face shape while maintaining hair health; placement determines whether the result looks lived-in or overdone.
Face Framing Balayage Sectioning Patterns and Hair Parting
Clean sectioning prevents missed spots and keeps placement intentional rather than random.
Creating Clean Subsections
Start by creating a clean center or side part, depending on the client's natural part or preference. From there, divide the hair into four main quadrants: two front sections and two back sections. The front sections are where face-framing happens, so treat them differently than the back.
Create vertical subsections about half an inch wide within each front section. Thinner subsections deliver precision; thicker ones allow faster application but sacrifice control.
Narrow subsections take longer but deliver better results for face-framing, where placement precision matters.
Pro tips for clean subsections:
- Use clips to hold sections you're not working on
- Keep subsections consistent in width across both sides
- Mark your sections with sectioning clips before you start mixing color
- Work from the hairline backward, not the other way around
Hairline Density and Saturation Placement
Hairline density varies dramatically, from thick to sparse, and determines how you apply lightener.
Dense hairlines handle full saturation; sparse hairlines need lighter application to avoid visible scalp and unnatural roots.
Apply lightener more heavily to subsections closest to the face, reducing saturation as you move back to maintain dimension without overdoing it.
Start saturation at about 75% at the hairline. Reduce to 50% in the mid-lengths. This gradient prevents harsh lines and creates blending that looks intentional.
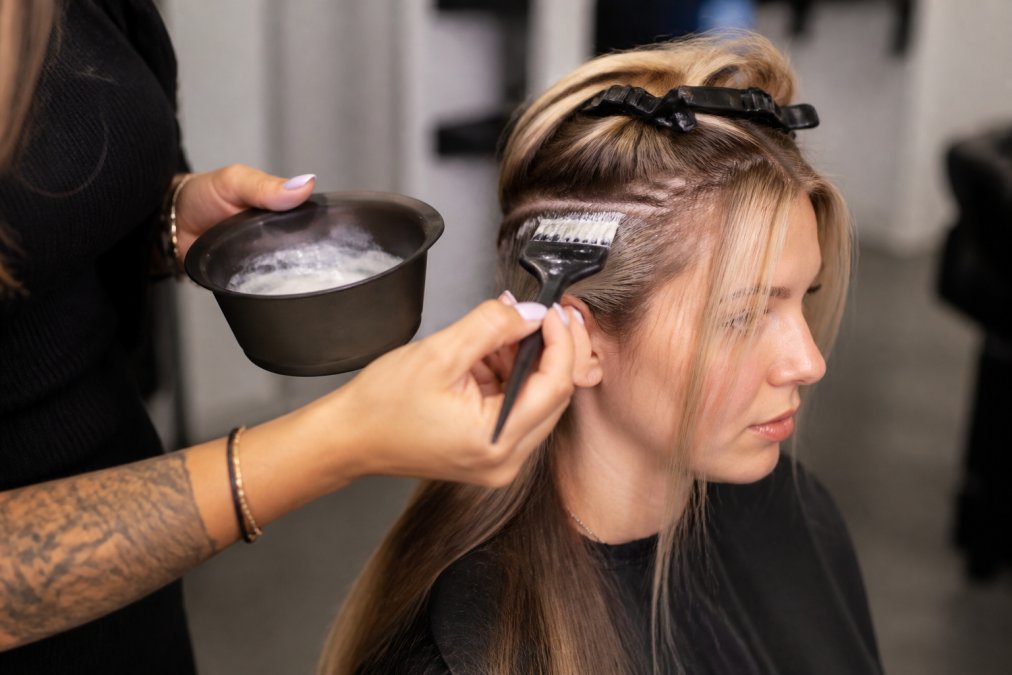
Freehand Painting vs. Foil Placement for Precision
The choice between freehand painting and foil placement changes everything about how you work. Each method has real advantages and real limitations.
When to Use Freehand Hair Painting
Freehand painting offers speed and flexibility without foil management, creating softer, more blended dimension naturally.
Freehand works best on medium to fine texture; it avoids the foil creases that can create visible lines in coarser hair.
Freehand requires confidence and constant visual checks since you can't isolate hair the way foils do.
Use freehand when you want:
- Softer, more blended results
- Faster application time
- Flexibility to adjust placement mid-service
- Lived-in, natural-looking dimension
Foil Placement for Controlled Lift and Brightening
Foils provide control and precision, isolating hair to achieve maximum lift in specific areas without affecting surrounding hair.
Foils work better on coarser hair, preventing creasing and allowing different processing times for different sections.
Foils take longer to apply but can look more dimensional, though contrast may appear less natural if too strong.
Use foils when you need:
- Maximum lift and brightening
- Precise control over placement
- Ability to process sections differently
- Consistent, repeatable results
ESTL+CO's professional hair color foils are engineered with a no-slip embossed design that keeps hair stable during application. The 12-micron thickness provides the control you need for face-framing work without the bulk of thicker foils.

Choosing the Right Developer Strength and Lightener
Developer strength determines how fast your lightener works and how much lift you can achieve. This decision affects processing time, hair health, and final color outcome.
20 volume developer is standard for balayage, providing steady, predictable lift without aggressive processing.
30 volume developer lifts faster but is too harsh for delicate, fine hair near the face.
Avoid 40 volume developer for face-framing work unless targeting very resistant, dark hair.
Quality lighteners lift evenly and predictably; cheap lighteners create spotty results and are drying on delicate face-framing hair.
Developer and lightener matching:
- 20 volume + quality lightener = predictable, even lift
- 30 volume + quality lightener = faster processing, higher lift
- Always use the same brand of developer and lightener for consistency
Best Tools for Balayage and Foil Techniques
The right tools make the difference between a service that feels smooth and one that feels like a struggle. Your hands matter. Your tools matter equally.
Feathered Brushes for Seamless Blending
Feathered brushes create softer edges and less demarcation between highlighted and non-highlighted hair, which is core to natural-looking blending.
Feathered brushes allow better saturation control, creating gradient effects that blunt-bristled brushes cannot achieve.
The handle matters too. A brush that causes hand fatigue by end of day costs you precision. ESTL+CO's feathered hair color brushes feature ergonomic design specifically engineered to reduce tension and pinching. The wide base makes for an easier grip, and the tapered tip creates neater sections.

Quality feathered brushes perform consistently; cheap brushes shed bristles and don't hold product evenly.
Professional Foils and Stain-Resistant Bowls
If you're using foils, invest in professional-grade foils. Thin foils (12 microns) work better than thick ones because they fold cleanly and don't create heavy creases. Heavy creases mean visible lines in the finished color.
ESTL+CO's Asymetrie Collection foils are pre-cut and pre-folded for easy dispensing. The embossed design prevents slipping, which means you're not constantly readjusting foils mid-application. This saves time and reduces mistakes.
A stain-resistant bowl is non-negotiable. Regular ceramic or glass bowls stain permanently after a few applications. Stained bowls look unprofessional, and some stains contain product residue that can affect color mixing. Stain-resistant bowls stay clean and perform consistently.
ESTL+CO's stain-resistant bowls are specifically designed for professional use. The U-shaped cutout holds your brush in place between sweeps, which reduces mess and speeds up your workflow. The tilted edge keeps product in the bowl during application.
How to Blend Face Frame Highlights for Natural Dimension
Blending is where technique becomes art. Perfect placement means nothing if the color doesn't blend seamlessly into the rest of the hair.
Root Smudge and Softening Techniques
Root smudge is the technique that prevents harsh lines at the base. After you've applied lightener to your face-framing subsections, take a clean, damp brush and feather the lightener where it meets the root. This creates a gradient from light to dark instead of a hard line.
Root smudging works because it breaks up the demarcation. Your eye doesn't see a clear boundary between highlighted and non-highlighted hair. Instead, it sees a soft transition.
The timing matters. Smudge too early and the lightener hasn't developed enough to show the final color. Smudge too late and the lightener has set, making feathering difficult. Smudge about halfway through processing time.
Softening techniques extend beyond the root. After removing foils or stopping freehand application, use a clean, damp brush to soften the edges of the highlighted sections. Blend into the surrounding hair with light, feathering strokes.
Toning and Glossing for Seamless Integration
Toning is the final step that makes everything look cohesive. Even perfect placement looks unfinished without toning. Toning neutralizes unwanted warmth and adds shine that makes the color look intentional.
For face-framing balayage, choose a toner that matches your target color but is slightly cooler than the lightened hair. This prevents the highlighted sections from looking brassy or yellow.
Processing Time, Visual Checks, and Hair Health
Processing time determines lift. Too short and you don't get the lightness you want. Too long and you risk over-processing, which damages hair and can cause breakage.
Troubleshooting Common Balayage Placement Mistakes
Even experienced colorists make placement mistakes. Knowing how to fix them separates good colorists from great ones.
Uneven Saturation and Contrast Issues
Uneven saturation happens when you apply lightener inconsistently across subsections. Some sections get heavy product. Others get light product. The result is spotty, uneven dimension.
Hair Texture Considerations and Weaving Patterns
Different hair textures require different approaches. Coarse, thick hair can handle aggressive lightening and bold contrast. Fine, delicate hair needs a lighter touch.
Frequently Asked Questions
What is the best balayage placement technique for face framing?
The best balayage placement technique for face framing focuses on strategic sectioning around the face, starting at the hairline and working outward. Use freehand painting for lived-in color and softer transitions, or foils for more controlled lift and brightening. The key is placing lighter pieces at the face-framing sections with proper hairline saturation and blending through root smudge techniques. Professional tools like feathered brushes ensure precision and ease of application for seamless dimensional results.
How do you section hair for face-framing balayage?
Divide the hair into clean subsections using precise parting techniques. Create a center part or side part depending on the client's face shape, then isolate face-framing sections around the temples, cheekbones, and jawline. Work in thin slices or weaving patterns to control hairline density and avoid over-saturation. Subsections should be small enough for freehand control but strategic enough to frame the face naturally. Proper sectioning prevents uneven color placement and ensures balanced brightening.
What tools are essential for precise balayage placement?
Professional-grade feathered brushes, stain-resistant tint bowls, and high-quality foils are essential for precision. ESTL+CO's Hair Color Brushes feature a wide feathered tip and ergonomic design for easier, neater color spread with tapered sections. Their stain-resistant bowls hold color securely during application, while the Asymetrie Foils provide no-slip embossed design for stable root placement. These salon-grade tools reduce hand strain, improve control during freehand painting or foil placement, and deliver consistent, professional results across every client.
How do you blend face-framing highlights for a natural, seamless look?
Blend face-framing highlights through root smudge techniques and toning. After processing, soften the line between highlighted and base color by applying a gloss or toner that bridges the contrast. Use feathered brushes to work color through the mid-lengths and ends, creating a lived-in effect rather than harsh demarcation. Pay attention to hairline saturation levels and ensure brightening is gradual. Proper toning and glossing seal the cuticle and create seamless dimension that looks intentional and naturally dimensional.