

Precise Balayage Paint Application: 7 Pro Tips
Table of Contents
- What You'll Need Before You Start Painting
- Best Tools for Balayage and Foil Techniques
- Balayage Brush Types for Precision: Which Shape Does What
- Sectioning Strategy: Quadrants and Subsections
- Mixing for Saturation and Diffusion
- How to Prevent Lightener Bleeding at the Root
- Feathering and Blending: Strokes That Melt the Line
- Balayage Paint Application on Different Hair Porosities
- Troubleshooting Blotchy or Spotted Application
- Frequently Asked Questions
Last Updated: September 17, 2026
What You'll Need Before You Start Painting
Precise balayage paint application starts with a clean station and the right supplies laid out before your client sits down. Rushing setup causes blotchy results.
Here is what you need within arm's reach:
- A stain-resistant tint bowl with a tilted edge
- Two angled color brushes (one for lightener, one for toner)
- Pre-cut, pre-folded foils
- Clips for sectioning
- A spray bottle of water
- A clean towel for the nape
ESTL+CO builds tools around one idea: a colorist should feel in control with every sweep, starting with gear that does not fight you.

A common mistake is mixing lightener in a round bowl that slides across the station. The bowl moves, your wrist compensates, and your stroke wobbles.
Best Tools for Balayage and Foil Techniques
The best tools for balayage and foil techniques share three traits: a wide feathered tip, a grippy handle, and a bowl that stays put. The details behind each trait separate a brush that fights you from one that disappears into your hand.
Balayage is a freehand painting technique where lightener is swept onto the surface of the hair rather than saturated end to end. Foil work locks in heat and keeps sections separated. Most modern services blend both, so your kit must serve two jobs.
Professional beauty industry resources from the American Board of Certified Haircolorists note that brush control separates clean work from muddy work. Control comes from four physical properties most guides never name:
- Bristle type: Boar bristles flag at the tip and release gradually, helping feathering. Stiff synthetic bristles dump product in one spot. A boar-synthetic blend gives both grip and release.
- Bristle density: Dense packing holds more lightener per load, so you make fewer dips and keep the stroke continuous. Sparse bristles force reloads mid-section, where spots start.
- Ferrule and handle weight: A metal ferrule adds rigidity so bristles fan instead of collapse. Too light a handle makes you over-grip; too heavy tires your wrist. Look for a balanced handle that sits level on the back of your hand.
- Tip shape: A wide feathered tip spreads product in one pass, so you sweep instead of scrub. A tapered tip creates neater root sections. Many colorists keep both loaded and switch mid-service.
Brush shape also matters to the stroke:
- Wide feathered tip: spreads product in one pass
- Tapered tip: neater root sections
- Wide base handle: easier grip, less pinching over a long service
ESTL+CO's professional hair color brushes come two to a box in four stain-resistant shades, built with a wide feathered tip and an ergonomic base to cut tension and cramping.
For foils, thickness and coating decide how the sheet behaves against the hair.
| Tool | Key Feature | Best For |
|---|---|---|
| Feathered tint brush | Wide tip, ergonomic base | Freehand balayage sweeps |
| Tapered brush | Fine tip | Root sections, face framing |
| Pre-cut foils | No-slip embossed texture | Foilayage and teasylights |
| Stain-resistant bowl | U-shaped brush rest | Multi-client days |
The bowl itself matters for precision. A round bowl slides across a smooth station, and when it moves, your wrist compensates and the stroke wobbles.
Balayage Brush Types for Precision: Which Shape Does What
Brush shape decides your stroke, and your stroke decides your blend. There is no single best balayage brush for precision, only the right shape for the job.
Here is how the main shapes behave:
- Flat wide brush: lays down broad saturation fast; great for mid-lengths and ends
- Angled brush: lets you pivot at the root without dragging product upward
- Round or tapered brush: gives you hairline control for face framing
- Feathered bristle brush: softens edges as you paint, which reduces harsh lines
Sectioning Strategy: Quadrants and Subsections
Start here:
- Part the hair down the center from forehead to nape.
- Part ear to ear across the crown.
- Clip each quadrant out of the way.
- Within each quadrant, take horizontal subsections about 1 to 2 centimeters thick.
- Work one subsection at a time, front to back.
Sectioning should match your foiling pattern. If you plan to alternate balayage and foilayage, section for both from the start, a quadrant parted for freehand painting will not accept a foil cleanly if the subsection runs the wrong direction. Decide your pattern before you pick up the comb, and part once.
Mixing for Saturation and Diffusion
Saturation and diffusion pull in opposite directions, and your mixing ratio decides which wins. Thicker lightener stays put; thinner lightener spreads and softens.
A few mixing rules that hold up in practice:
- Mix lightener and developer by weight, not by eye
- Start thicker, then thin with a splash of developer if needed
- Mix small batches and remix often; bleach dries out and stops working
- Never mix more than you can apply in about 20 minutes
How to Prevent Lightener Bleeding at the Root
To prevent lightener bleeding at the root, keep product 1 to 2 centimeters from the scalp and use less saturation near the base. Bleed happens when thin product migrates into the root zone and creates a hot spot.
Four habits stop it:
- Load less product on the brush for root-adjacent sweeps
- Angle the brush so the tip points away from the scalp
- Do not over-saturate the first inch of hair
- Keep the client's head still while product sets
Feathering and Blending: Strokes That Melt the Line
Feathering is the technique of tapering product at the end of each stroke so the color fades instead of stopping. It is what turns a painted stripe into a soft, blended result.
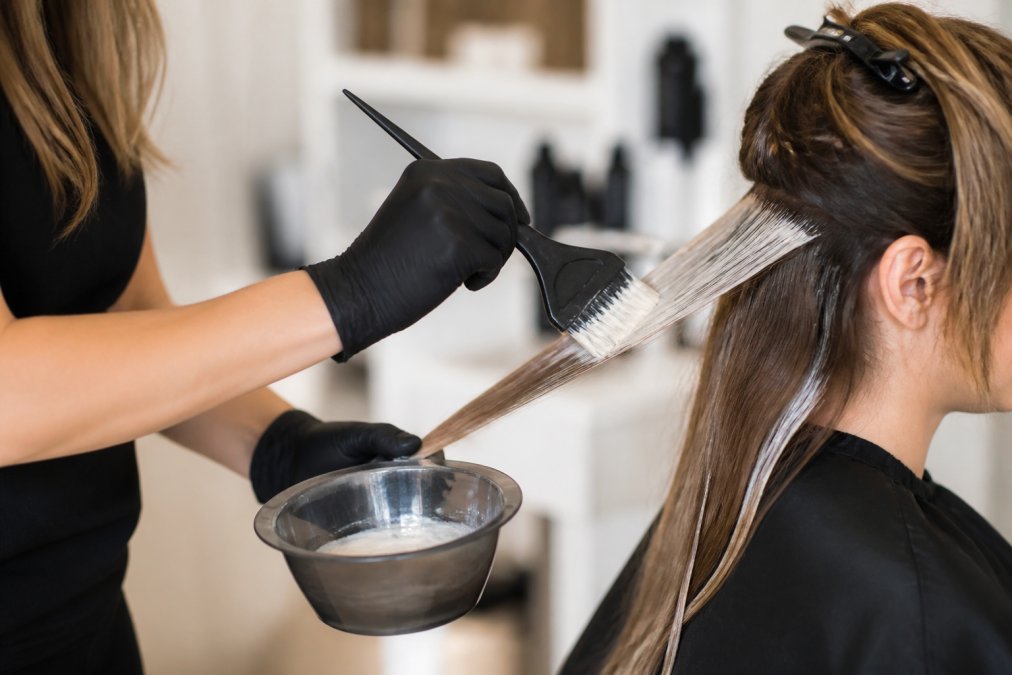
Three strokes that melt the line:
- The lift: press at the mid-length, lift toward the ends
- The flick: a quick wrist turn at the end to feather the tip
- The blend-back: a light pass over the transition zone with a nearly dry brush
Balayage Paint Application on Different Hair Porosities
Hair porosity changes how fast lightener works, so the same formula behaves differently on every client. Porosity, how easily hair absorbs and holds moisture, decides your processing time.
Here is the practical breakdown:
| Porosity | How It Lifts | Adjustment |
|---|---|---|
| Low | Slow, resistant | More processing time, thinner sections |
| Medium | Even, predictable | Standard formula and timing |
| High | Fast, uneven | Lower developer volume, check often |
Troubleshooting Blotchy or Spotted Application
Blotchy application almost always traces back to uneven saturation, dry lightener, or rushed sectioning. Spots are not random; they follow the places where product was thin.
Work through these fixes:
- Spots at the mid-lengths: you skipped a pass; reload and blend back
- Patchy lift near the root: product was too thin and bled; keep it thicker
- Brassy bands: lightener dried before processing finished; remix more often
- Harsh lines: no feathering at the stroke end; lift the brush as you finish
Frequently Asked Questions
What type of brush is best for precise balayage paint application?
A wide feathered brush with a tapered tip gives you the control to create neater sections and softer edges. The feathered bristles hold enough lightener for saturation while releasing it smoothly, which reduces harsh lines. Ergonomic handles matter too: a wide base lets you grip without pinching, so your wrist stays relaxed through back-to-back services. Look for stain-resistant bristles that keep their shape after repeated washing.
How do you prevent lightener bleeding during balayage application?
Bleeding usually starts with consistency and saturation. Mix lightener thick enough that it clings to the hair without running, and apply it with enough product that the section is fully coated but not dripping. Keep foils or film firmly in place, and avoid over-saturating the root area. If you see product creeping, stop and wipe the edge with a dry towel before continuing. Working in smaller subsections also limits how far any slip can travel.
What is the best consistency for balayage lightener?
You want a consistency like thick sour cream or toothpaste: it should hold a peak on your brush and not slide off when you tilt it. Too thin and it bleeds into the root; too thick and it won't diffuse through the hair. Add developer in small amounts and mix thoroughly. For maximum diffusion, a slightly looser mix can work on fine hair, but always test on a small section first. Keep your bowl tilted so the product stays put.
How do you maintain saturation while painting balayage?
Load your brush fully but wipe off excess on the bowl rim so you're not flooding the section. Paint in firm, even strokes from mid-length to ends, then feather upward toward the root. Work in small sections so the lightener doesn't sit too long before you move on. If the product starts to dry, remist the section lightly or work faster. Using a stain-resistant bowl with a tilted edge keeps the product contained and ready to reload.
Precision in balayage paint application comes down to tools that keep up with your hand, not the other way around. ESTL+CO builds salon-grade equipment designed by a pro, for pros, from stain-resistant tint bowls with a U-shaped brush rest to ergonomic feathered brushes that reduce cramping and improve control. When you are ready to stop fighting your gear and start blending with ease, get started with ESTL+CO and give every client a cleaner, more even result.