

Which Professional Toner Blends Best for Color Melting?
Last Updated: October 28, 2026
Quick Summary
The best professional toner for seamless color melting is a warm, reflective neutral such as pearl or beige, matched to the hair's starting level. Choosing the shade by level and undertone, rather than by name alone, lets the toner blend into balayage instead of forming a visible band.
- Read the starting level on a 1-to-10 scale before choosing any shade.
- Choose the warmest shade that still neutralizes the unwanted tone.
- Use a 1.9% (6 volume) developer for soft deposit when toning balayage.
- Check porous ends first and rinse them early to avoid patchy, dark sections.
- Check the result in daylight before rinsing, since salon lighting hides warmth.
Table of Contents
- What Makes a Toner Blend Seamlessly
- Best Toner for Balayage: Matching Level to Shade
- T14 vs T18 Toner: Which Shade Suits Your Client
- How to Tone Balayage Hair Without Harsh Lines
- Professional Hair Gloss for Highlights as a Blending Step
- Common Blending Mistakes and How to Fix Them
- Stocking Your Station for Consistent Color Melting
- Frequently Asked Questions
Professional toner decides whether balayage looks seamless or shows harsh lines. Most colorists buy a toner for its shade name, then discover the result doesn't blend into the surrounding highlights.
The research we reviewed points in one clear direction. Semi-permanent toners typically last 10 to 14 days, and the 2026 trend coverage favors warm, reflective neutrals such as pearl and beige over dull ash tones.
What Makes a Toner Blend Seamlessly
A professional toner blends well when its deposit and undertone match the lift already in the hair. Melting depends on how the toner sits against the highlights, not on the shade name alone.
Why Color Melting Depends on Deposit and Undertone
Deposit is how much color the toner leaves behind. Undertone is the warm, cool, or neutral cast it adds. A toner that deposits too heavily can sit on top of the highlights as a visible band, while a light, reflective formula tends to blend into the surrounding color. Warm reflective neutrals are the category current trend coverage points toward, and they are the easiest place to start when you want the toner to disappear into the balayage.
Best Toner for Balayage: Matching Level to Shade
Most toner roundups list shades by name and leave the reader to guess which one fits the hair in the chair. That is backwards. A toner only melts when its deposit and undertone are matched to the level of lift already in the hair and to the warmth the lightening exposed. Use the hair's starting depth as the first filter, then choose the undertone.
Read the Starting Level Before You Choose a Shade
Professional colorists describe starting depth on a 1-to-10 scale, where 1 is black and 10 is the lightest pale blonde. The level tells you how much pigment is left in the hair and how much room the toner has to work. A common pattern is that the lower the level, the more warmth is still present and the more neutralizing the toner has to do.
- Level 10 (pale blonde): little warmth remains, so the toner should add reflection rather than heavy coverage. A pearl or violet-based shade keeps the result clean without dulling it.
- Level 9 (light blonde): yellow is usually the dominant undertone. A shade with a violet or blue-violet cast neutralizes it while staying reflective.
- Level 8 (medium blonde): yellow-orange is common, especially on previously colored hair. A beige or warm-neutral shade softens the orange without going flat.
Match the Undertone to the Result You Want
Once the level is set, the undertone decides the finish. Cool and ash tones cancel warmth but can read gray on porous or over-lightened hair.
A practical rule: if the goal is a seamless melt, choose the warmest shade that still neutralizes the unwanted tone. Going one step cooler than necessary is the most common reason a toner looks like a separate band instead of part of the balayage.
Product Examples by Level
Specific shade codes vary by line, so always read the manufacturer's chart before mixing. For mid-level blondes where brass is heavier, a warm reflective neutral does more work than a pale pearl shade. Test any shade on a small section first, because two heads at the same level can react differently depending on history and porosity.
Why the Same Level Can Need Different Toners
Level is the starting point, not the whole answer. Two level-8 clients can need different toners if one has fine, porous hair that grabs color and the other has resistant hair that barely takes it. Factor in hair history, previously lightened sections, old box color, heat damage, before you commit to a shade. When in doubt, go one shade warmer and one developer step gentler; it is easier to add depth than to remove a band.
T14 vs T18 Toner: Which Shade Suits Your Client
T14 and T18 are shade codes used by many toner lines, and the difference between them is the undertone. Choosing a shade that leans too cool can sometimes lead to unwanted green or muddy tones, requiring you to fix brassy balayage if the initial neutralization process fails to balance the underlying pigment.
Ask your client what they want the final color to look like in daylight, not under salon lighting. A shade that looks right at the station can read too cool or too warm once the client leaves.
How to Tone Balayage Hair Without Harsh Lines
Application is where a good shade choice either melts or stripes. The toner has to sit evenly against highlights that may have different porosity, different levels of lift, and different amounts of warmth. Treat the head as several zones, not one, and adjust as you go.
Section and Feather for a Soft Transition
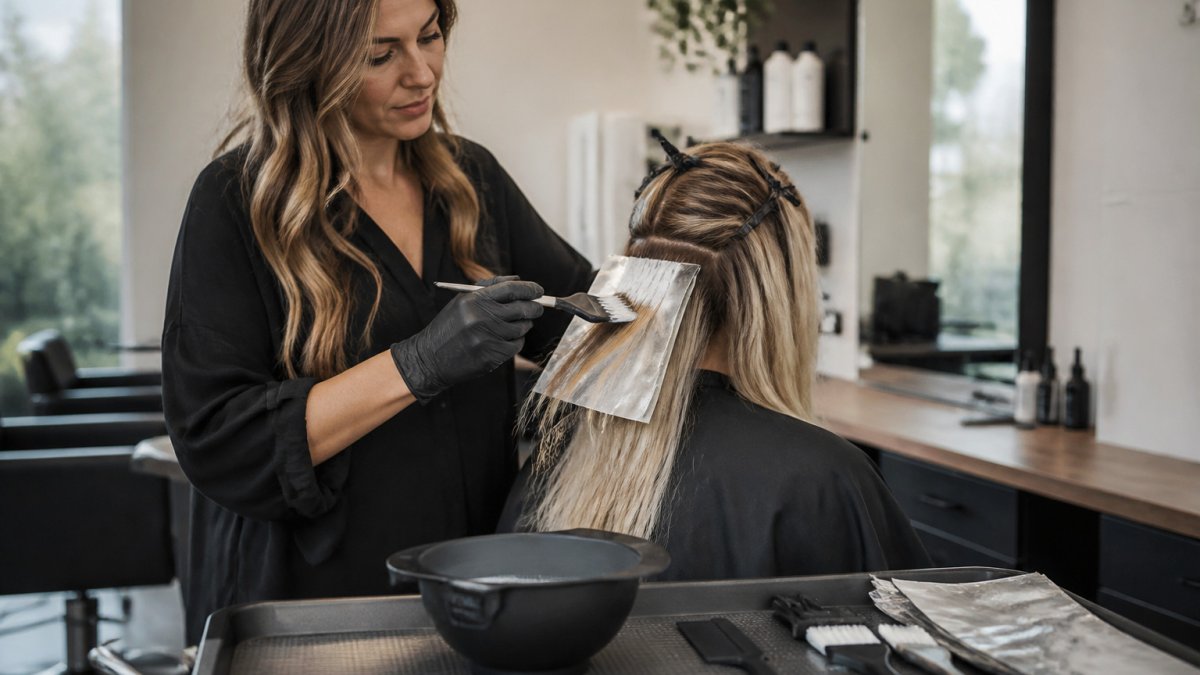
Work in thin, horizontal sections and apply the toner with a feathered brush in light, sweeping strokes. Start at the mid-lengths and ends, where the hair is usually more porous and takes color faster, then move toward the root. Keep the toner off the scalp unless you are deliberately blending a root shadow, and feather the upper edge so there is no hard line where the toner stops.
Developer Strength: Match the Lift to the Goal
Developer strength controls how much the cuticle opens and how much deposit you get. Learn how to choose the right developer for balayage based on your hair's porosity and processing needs. A common professional approach is:
- 1.9% (6 volume) developer: the gentlest option, used for soft deposit and minimal lift. It is the usual starting point when toning foils or balayage where you want the result to stay blended and reflective.
- 3% (10 volume) developer: stronger deposit and a small amount of lift, used for full-head coloring or when the hair needs more neutralization.
- Higher volumes: generally reserved for lightening, not toning. Using them on already-lightened balayage risks over-depositing and creating a band.
Match the developer to the porosity and history of the hair, not just to the shade. Porous, previously lightened sections process faster, so a gentler developer gives you more control.
Processing Time and Porosity: The Real Cause of Bands
Porosity is how readily the cuticle absorbs and holds color. Highly porous ends can grab toner within minutes, while resistant mid-lengths may need the full processing time. If you apply one mix for one time across the whole head, the porous sections over-deposit and the resistant sections under-deposit, and that difference is what reads as a visible band.
Check porosity before you apply by running a strand between your fingers and watching how quickly it absorbs water. Then adjust:
- Apply to the most resistant sections first and the most porous sections last.
- Check the porous ends at the early end of the processing window and rinse them first if they are developing faster.
- Keep a spray bottle of water on hand to dilute toner on sections that are grabbing too much.
Blend the Root Without a Line
If you are toning a root area, apply the toner in a soft shadow rather than a solid block. Use a brush with a light hand and pull the product down in feathered strokes so it fades into the mid-lengths. The goal is a gradual transition, not a distinct band of color at the scalp. For a root shadow, a slightly warmer shade than the mid-length toner often blends more naturally because it echoes the warmth near the scalp.
Check the Result in Daylight Before You Rinse
Salon lighting flatters toner. Before you commit to a full rinse, check a small section in daylight or with a color-corrected lamp. If the toner looks slightly too cool or too ashy, rinse early rather than processing longer, you can always reapply a warmer shade, but you cannot easily remove an over-cool band.
Professional Hair Gloss for Highlights as a Blending Step
A professional hair gloss can finish the blend after toning. Gloss adds shine and softens the transition between toned highlights and the base color. It is a useful step when the toner looks slightly flat or when you want the result to read as one even tone.
Gloss is also a good way to refresh color between appointments. Because semi-permanent results typically last 10 to 14 days, a gloss can extend how long the blend looks fresh without a full reapplication.
Common Blending Mistakes and How to Fix Them
The most common error is choosing a toner that is too ashy for the hair's underlying warmth. The result looks dull and sits apart from the balayage.
Overloading the brush is the second mistake. Too much product creates a visible band. Load the brush lightly and build color in thin layers.
The most frequent blending errors come down to a few causes, each with a clear fix.
| Problem | Cause | Fix |
|---|---|---|
| Toner looks dull and sits apart | Toner too ashy for the hair's warmth | Switch to a warmer, reflective neutral |
| Visible band across highlights | Too much product loaded on the brush | Load lightly and build color in thin layers |
| Porous ends look darker than highlights | Toner left on too long on porous ends | Check timing on porous sections first and rinse early |
Stocking Your Station for Consistent Color Melting
Consistent results come from having the right tools at the station every time. A stain-resistant tint bowl and a feathered brush
Keep a shade chart and a consistent developer on hand so you can repeat a formula for returning clients. Recording the toner, developer, and processing time for each client makes it much easier to hit the same blend again.
Frequently Asked Questions
Which toner is better, T14 or T18?
Neither is better in every case. T14 and T18 sit at different levels and deliver different undertones, so the right choice depends on the lift your client's hair has reached and the shade they want. Test on a hair section first, since porosity and prior color change how each toner deposits. Choose the level that matches the hair's current brightness, then adjust the depth with developer strength and processing time rather than switching levels mid-service.
What toner should you use for balayage highlights?
Use a toner matched to the lightest level the highlights reach and the undertone you want to neutralize. Pale blonde highlights usually need a higher-level toner to avoid a yellow cast, while mid-level blonde may need a shade with more neutralizing pigment. Apply the toner to the highlighted lengths and blend it into the root area with a feathered brush so the transition stays soft instead of banded.
How do you blend toner between roots and highlighted lengths?
Work from the mid-lengths to the ends first, then feather the product upward toward the root using light strokes. Keeping the toner slightly diluted or applying it with the feathered brush helps prevent a visible line where the root and highlight meet. Check the blend under natural light before rinsing, because artificial salon lighting can hide a harsh edge.
How long should professional toner process?
Processing time depends on the product, the developer, and the condition of the hair, so follow the manufacturer's instructions for the specific toner. Check the color every few minutes during processing, since over-processing can shift the shade cooler or flatter than intended. Stop when the desired tone is reached rather than waiting for a set time.
Getting a seamless toner blend comes down to matching deposit and undertone to the hair, using the right developer, and applying with a feathered brush. Start with a warm, reflective neutral for most balayage, and test before you commit. ESTL+CO makes the feathered brushes, stain-resistant bowls, and station tools built for this work, so you can set up your workflow once and repeat it consistently.
