

7 Benefits of Using Hair Painting Boards for Balayage
Last Updated: October 29, 2026
Quick Summary
Hair painting boards are firm, flat surfaces placed under a section of hair so colorists can paint balayage freehand onto a stable base. They help keep brush strokes even, place color cleanly, and make it easier to control saturation and keep finished sections out of the way.
- Position the board with a small gap above the scalp to keep lightener off the root.
- Take a section no wider than the board so hair does not hang off and pick up stray product.
- Hold the hair flat with light tension; heavy tension can push product through to the underside.
- Clip each painted section away before moving on to prevent product transfer and uneven development.
- Wipe the board after every client and wash it gently, since built-up product can transfer to the next section.
Table of Contents
- What a Hair Painting Board Does in Balayage
- Key Benefits of Using a Hair Painting Board
- How to Use a Balayage Board Step by Step
- Balayage Board vs Foil: When Each Works Better
- Choosing the Right Balayage Tools for Colorists
- Common Mistakes and How to Clean Your Board
- Setting Up Your Next Balayage Service With ESTL+CO Foils
- Frequently Asked Questions
Balayage is one of the most requested techniques in modern color studios, and clients want soft, sun-kissed results with clean placement. Hair painting boards, the flat, rigid surfaces that hold sectioned hair while you paint, are one of the simplest tools that help you get there, and understanding how hair painting boards work is the first step toward better results.
What a Hair Painting Board Does in Balayage
A hair painting board is a firm, flat surface placed under a section of hair so the colorist can paint lightener or tint directly onto the strand, a stable workspace that moves with the hair instead of against the scalp.
Balayage relies on freehand painting, so the board supports the hair while your hand moves freely. Many colorists use a wider board for longer sections, and a narrower one for fine, detailed placement around the face.
Key Benefits of Using a Hair Painting Board
Here are the main advantages colorists report when they add a board to their routine:
- Steady surface: The hair stays flat, so your brush strokes stay even.
- Cleaner placement: Color lands where you intend, with less bleeding onto the scalp.
- Better saturation: A firm base helps you control how much product reaches each strand.
Keep in mind that a board is a support, not a substitute for technique. Placement, pressure, and timing still decide the final look.
How to Use a Balayage Board Step by Step
Most guides show a board in use but never spell out the sequence. This walkthrough covers the mechanics that matter at the chair: where the board sits, how much tension to use, how wide a section to take, and how to move between sections without disturbing the last one.
Step 1: Set Up the Station Before Sectioning
Lay out the board, brush, mixing bowl, and a spray bottle of water within reach of your non-brush hand. Keep the board on a lint-free towel so residue does not transfer to the next client. Mix lightener slightly thicker so it holds a line on the board rather than running off the edge, which reduces drip onto the scalp. Ensuring this precision during application minimizes unnecessary product contact, which remains a fundamental component of consistent scalp health maintenance.
Step 2: Part a Clean, Workable Section
Take a section no wider than the board so no hair hangs over the edge and picks up product from the surface below. For standard balayage placement, roughly 1 to 2 inches wide and a quarter-inch thick is a practical starting point; go narrower around the face and hairline where precision matters more.
- Part the hair with a clean, straight line from the root to the ends so the section lies flat.
- Clip the rest of the hair away from the work area so loose strands do not fall across the board.
- Comb the section smooth before you slide the board under it; twisted or folded strands paint unevenly.
Step 3: Position the Board Correctly
- Slide the board under the section from the ends toward the root, stopping short of the scalp. A small gap keeps lightener off the root and protects client comfort.
- Angle the board roughly parallel to the curve of the head so the hair falls naturally across it. Tilting it toward you can make product pool at the low edge.
- Check the tension. The hair should lie flat and smooth but not pulled tight. Light tension keeps the strand straight for even saturation; heavy tension stretches the hair and can push product through to the underside.
Step 4: Hold the Section and Paint
Hold the section with your non-brush hand near the ends, keeping the hair flat against the board. Paint in short, controlled strokes from mid-length toward the ends, then back toward the root line if the design calls for it. Keep the brush at a shallow angle so the bristles feather the product rather than depositing a hard stripe. For a softer blend, back-comb the section lightly or feather the product with the brush tip.
- Saturation check: Look at the underside of the board. If product is visible through the hair, you have saturated the section; if the strand still looks dry, add a little more.
- Product control: Wipe the brush on the bowl edge between strokes so you are not loading too much at once.
- Timing: Work in a consistent order so each section gets roughly the same development time.
Step 5: Move to the Next Section Without Disturbing the Last
When a section is painted, lift the board away and let the hair fall naturally. Clip the painted section aside, then take the next one. Work from the bottom of the head upward so painted sections hang clear of the ones you are still working on, and keep a clean towel nearby to wipe the board between sections.
Step 6: Finish and Check the Blend
Once all sections are painted, lift the hair and check the transition from painted mid-length to natural root. If a line is too hard, feather it with a dry brush or a light mist of water before processing.
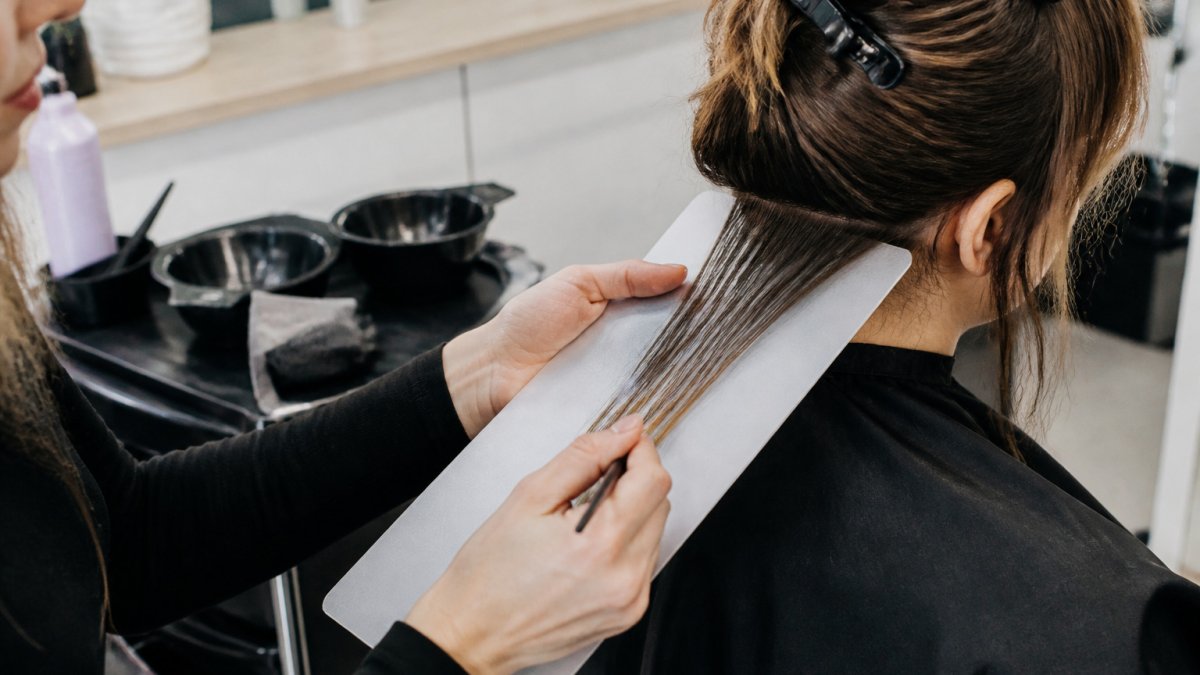
Quick Reference: Board Positioning at a Glance
| Stage | What to Check | Why It Matters |
|---|---|---|
| Sectioning | Section no wider than the board | Prevents hair from hanging off and picking up stray product |
| Positioning | Small gap between board edge and scalp | Keeps lightener off the root and protects comfort |
| Tension | Hair flat but not pulled tight | Even saturation without product push-through |
| Painting | Short strokes, shallow brush angle | Feathers the product instead of striping it |
| Between sections | Clip painted hair away | Prevents transfer and uneven development |
Following this sequence consistently is what turns a board from a flat surface into a repeatable balayage workflow.
Balayage Board vs Foil: When Each Works Better
A board and foil solve different problems. Foils fold the hair around the color and suit precise, contained highlights. A board is better for freehand painting, where you want soft, graduated color with no hard lines. To see why brush bristle choice matters for blending, read about feathered bristles for balayage.
Choosing the Right Balayage Tools for Colorists
A board is only useful if it matches the section you are painting and the hair in front of you. This section covers size, shape, and material, matching a board to hair length and texture, and keeping it clean between clients.
Match Board Size to Section Size and Hair Length
- Width: Choose a board wide enough that the section lies fully on it with a little margin; a narrower board lets hair hang over the edge and pick up stray product.
- Length: Longer boards suit long hair and large balayage placements; shorter boards are easier to control around the face and on shorter cuts.
- Thickness: A rigid board holds its shape under the weight of wet hair; a thin or flexible board can bow and change the tension on the strand.
As a practical rule, keep one wider board for long sections and one narrower board for detail work around the hairline. Most colorists find two sizes cover the majority of clients.
Choose Shape and Material for Control and Durability
- Shape: A flat, rectangular surface gives the most stable base. Curved or contoured boards can help with the shape of the head but are harder to keep level while painting.
- Material: Look for a rigid, non-porous surface that is easy to wipe clean. Non-porous surfaces resist staining from lightener and tint and do not absorb product that could transfer to the next section.
- Edge finish: Smooth, rounded edges are gentler on the hair and easier to clean than sharp edges where product collects.
Match the Board to Hair Type and Technique
- Fine hair: Use light tension and a narrower section. Fine hair saturates quickly, so a board that keeps the strand flat helps you avoid over-saturating.
- Thick or coarse hair: Take thinner sections and use a wider board so the hair lies flat; thick sections can lift off the board and paint unevenly.
- Curly or textured hair: Stretch the section smooth before painting, or work with the natural pattern depending on the desired result. A board keeps the section flat, but the curl pattern still affects where product sits.
Pair the Board With the Right Brush and Bowl
- Brush: Feathered bristles help with soft blending; firmer bristles give more control for precise placement. Keep a separate brush for lightener and tint if your workflow allows.
- Bowl: A stain-resistant bowl keeps your workspace cleaner and cleanup faster. Mix only what you need for the section so product does not sit and dry out.
Clean and Store the Board Between Clients
Board hygiene is the part most guides skip. Product buildup can transfer onto the next section and affect your results, and dried lightener is harder to remove than fresh product.
- Wipe off product residue while it is still soft, using a damp cloth or paper towel.
- Wash with a gentle cleanser and rinse thoroughly; avoid abrasive pads that scratch the surface and create places for product to collect.
- Dry the board completely before storing so moisture does not sit on the surface.
- Store flat or on edge in a clean, dry spot away from open product containers.
Common Mistakes and Troubleshooting
- Section slipping off the board: The section is wider than the board or the board is tilted. Take a narrower section and level the board.
- Uneven saturation: Tension is too tight or the section is twisted. Comb the section smooth and use light tension.
- Product transfer: Painted hair is resting against unpainted hair. Clip each finished section away.
Common Mistakes and How to Clean Your Board
A common mistake is sliding the board too close to the scalp, which can cause lightener to bleed onto the root and create a harsher line than you want. Another is pulling the hair tight across the board, which can leave uneven color. Clean the board after every client: wipe off residue while it is still soft, then rinse or wipe with a gentle cleanser. For specific methods, see ways to remove hair dye stains from tint bowls.
Setting Up Your Next Balayage Service With ESTL+CO Foils
If you pair freehand painting with foil work for certain clients, ESTL+CO Asymetrie Hair Color Foils are a practical option. To set up your station in one order, you can shop the complete station bundle with brushes, bowls and barrier cream. Each sheet is 5 inches by 11 inches and 12 microns thick, and the embossed surface gives extra grip so the foil stays put. You can browse the professional no-slip hair foils to compare sizes and finishes.
Frequently Asked Questions
What is a hair painting board used for?
A hair painting board is a flat, stable surface placed under a section of hair during balayage or foil highlighting. It keeps the section flat and separated from the rest of the head, so the colorist can paint lightener or color onto the strands without the hair shifting, folding or touching previously colored lengths. Stylists use it to hold hair away from the scalp and to create cleaner, more controlled lines. Boards are most useful when working with wider or longer sections that would otherwise slide around during application.
Do hair painting boards make balayage easier?
For many colorists, yes. A board gives a firm working surface that reduces the effort of holding hair up while painting, which can speed up the workflow on longer services. Because the board keeps the section isolated, it also helps prevent lightener from bleeding onto sections that are not meant to be lifted. The results still depend on technique, sectioning and product placement, so a board supports good work rather than replacing skill.
Are hair painting boards better than foils for balayage?
Neither tool is better in every case. Hair painting boards are designed for freehand work where the colorist paints color onto the hair surface and wants a stable base under the section. Foils are useful when the goal is to isolate a strand completely and control heat or processing. Many colorists use boards for soft, painted balayage and foils for precise, defined highlights. The right choice depends on the look, the hair length and the level of isolation required.
Can you use a hair painting board at home?
Hair painting boards are designed for professional use, and a board is most practical in a salon or studio setting where a stylist works on clients regularly. Someone doing their own balayage at home may find that a simple flat surface such as a clean piece of stiff plastic or cardboard covered in foil provides some of the same support. Results will vary, so anyone attempting the technique at home should practice on a small section first.
