

How to Avoid Patchy Hair Color: A Pro Colorist's Guide
Table of Contents
- Why Patchy Hair Color Happens (And How to Stop It Before You Start)
- How to Section Hair for Even Color Application
- Hair Porosity and Color Absorption: Why Some Strands Drink More Pigment
- Best Tools for Balayage and Foil Techniques That Prevent Patchiness
- Mixing and Applying Color: Saturation, Developer Volume, and Timing
- Fixing Uneven Lift and Correcting Patchy Hair Color
- Conclusion: Building a Patch-Proof Color Routine
- Frequently Asked Questions
Last Updated: October 2, 2026
Why Patchy Hair Color Happens (And How to Stop It Before You Start)
Patchy hair color is uneven pigment distribution that leaves some sections darker, lighter, or a different tone than the rest.
Patchiness is preventable. Below are the exact steps that stop it, sectioning, porosity checks, saturation, developer choice, and timing, plus how to fix uneven lift after the fact.
Here's what most guides miss: patchy results are usually a saturation problem, not a formula problem. Most colorists blame the color.
Three things drive almost every patchy outcome:
- Too little product on thick or long sections, so the color never fully saturates
- Uneven sections that leave hidden strands underneath
- Wrong developer volume for the level of lift you need
Fix those three and you eliminate most patchiness before it starts.
How to Section Hair for Even Color Application
Sectioning is the foundation of even color. A clean, consistent pattern lets you apply color in a repeatable order, so no strand gets missed or double-processed.
Follow these steps for a reliable sectioning routine:
- Start with dry, detangled hair and comb it through completely
- Divide the head into four quadrants using a center part and a part from ear to ear
- Clip each quadrant out of the way
- Within each quadrant, take horizontal subsections no wider than the brush head
- Keep subsections uniform in size so processing time stays consistent
- Work in a set order every time, so you never lose your place
Subsection width matters more than most colorists think. A section wider than your brush leaves middle strands under-saturated. Take thinner sections than feels natural, it adds a few minutes and saves a correction appointment.
For balayage and foil work, the section pattern changes. You'll take diagonal or V-shaped subsections to follow the natural fall of the hair. The goal is the same: uniform size, uniform saturation.
Hair Porosity and Color Absorption: Why Some Strands Drink More Pigment
Hair porosity is how well hair absorbs and holds moisture and color. High-porosity hair soaks up pigment fast and can grab too much; low-porosity hair resists absorption and can process unevenly.
This is the part most guides skip. Two heads at the same level can absorb the same formula at completely different rates. If one section is more porous than another, you'll get patchiness even with perfect application.
Here's how to check porosity before you color:
- The strand test: drop a clean strand in a bowl of water. If it sinks fast, porosity is high. If it floats, porosity is low.
- The feel test: rough, dry, or brittle sections usually mean high porosity.
- The history check: previously bleached or box-dyed sections are almost always more porous than virgin hair.
Once you know the porosity, adjust your approach:
- High porosity: use a lower developer volume and apply quickly, since the hair grabs fast
- Low porosity: use a slightly higher developer volume and allow more processing time
- Mixed porosity: apply to the most resistant sections first, then the rest
Best Tools for Balayage and Foil Techniques That Prevent Patchiness
Most guides tell you which brush to buy. Almost none explain how the tool interacts with product viscosity and hand pressure, which is where "holidays" (missed spots) actually come from.
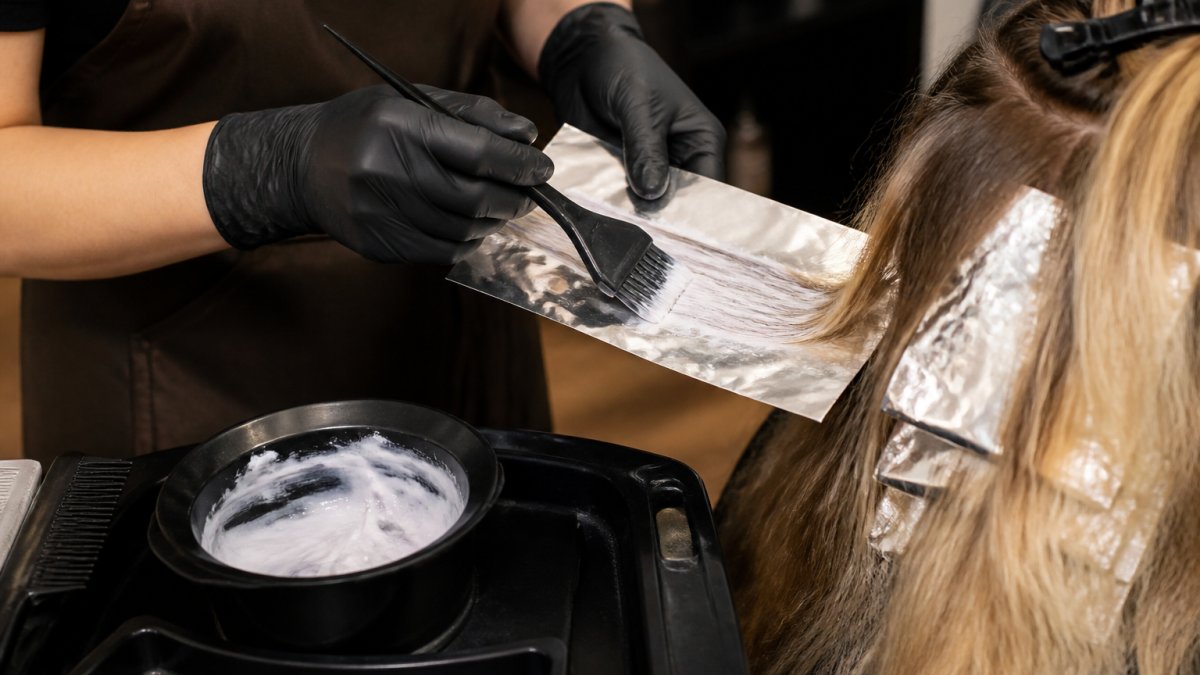
Viscosity first, tool second. Mixed too thick, color sits on top of the section and leaves the underside dry.
Brush pressure is a technique, not a preference. There are three distinct pressures and each does a different job:
- Feather pressure (light): drag the brush flat across the surface of the section to lay down a thin, even film. This is your base coat and it is where most patchiness is prevented or created.
- Ribbon pressure (medium): press the bristles into the section so product pushes between the strands, not just over them. Use this on the mid-lengths and ends where density is highest.
- Root tap (firm, short strokes): use only the tapered tip at the scalp line, with short back-and-forth strokes. Long strokes at the root are what cause hot roots and overlapping bands.
The saturate-and-check rhythm. After every subsection, run the back of your comb through it once. Dry strands mean a holiday, reload and reapply before moving on.
Tool features that support the technique above:
- Feathered bristles that fan product across the section in one pass instead of streaking it
- A tapered tip for root taps and clean part lines
- A firm spine and flexible tip so you can switch between ribbon pressure and feather pressure without changing tools
- An ergonomic handle so grip stays steady through a full day of services
- A stain-resistant bowl with a tilted edge so product stays pooled and you are not re-dipping mid-section
[ESTL+CO's Hair Color Brushes](https://estlco.com/products/hair-color-brushes) use a wide feathered tip for even color spread and a wide base for easier grip. The tapered tip creates neater sections, while the feathered bristles provide a more comfortable experience for your client. Two per box, in four stain-resistant shades.

Pair them with the Hair Color Bowls from the same collection. The tilted edge keeps dye in the bowl and the U-shaped cutout holds your brush between sweeps, less re-dipping, more consistent saturation per section. Two bowls per box.

| Tool | Key Feature | Why It Prevents Patchiness |
|---|---|---|
| Feathered tint brush | Wide feathered tip | Spreads color evenly in one pass |
| Tapered-tip brush | Narrow tip | Creates clean, neat sections and root taps |
| Stain-resistant bowl | Tilted edge, brush cutout | Holds product and brush steady |
| Barrier cream stick | Stick applicator | Protects skin, keeps lines clean |
The Barrier Cream Stick rounds out the station setup. It applies fast around the hairline to protect skin from stains, so you can work cleanly without slowing down.

Mixing and Applying Color: Saturation, Developer Volume, and Timing
Saturation is the single biggest factor in even color. A fully saturated section looks wet and glossy; a dry, patchy section means color didn't reach every strand.
Developer volume controls how much lift you get and how fast. The wrong volume causes uneven lift, especially on mixed-porosity hair.
| Developer Volume | Lift Level | Best For |
|---|---|---|
| 10 volume | Deposit only | Toning, glossing, no lift |
| 20 volume | 1-2 levels | Gray coverage, subtle lift |
| 30 volume | 2-3 levels | Standard lightening |
| 40 volume | 3-4 levels | Maximum lift, resistant hair |
A common mistake is using 40 volume everywhere to "make sure it lifts." That's how you get hot roots and patchy mids.
Timing matters just as much.
To keep application even:
- Mix enough product. Running short mid-head forces you to skimp on the last sections.
- Apply in thin, uniform subsections every time.
- Check saturation as you go. If a section looks dry, add more.
- Emulsify at the shampoo bowl with warm water to blend the color line.
Fixing Uneven Lift and Correcting Patchy Hair Color
Correction starts with diagnosis, not product.
Step 1: Diagnose the patch.
- Too light in spots? The section over-processed, sat with lightener too long, or had higher porosity than the rest. Look for a patch that is one to three levels lighter than the surrounding hair, often at the mid-lengths or ends.
- Too dark in spots? The section did not saturate, used too low a developer volume, or was missed entirely during application. These patches usually sit at the back of the head or under a top layer.
- Right level, wrong tone? The undertones were not neutralized. This is the most common patch type and the easiest to fix with a toner.
- Banded or striped? Overlapping applications or inconsistent section width. These need a different approach than a spot patch.
Step 2: Match the fix to the patch.
Toner is the first tool for tone-only patches.
Color wheel correction handles specific patch tones. The rule is simple: opposite on the wheel neutralizes.
- Orange patches: blue-based toner neutralizes them. Orange sits opposite blue on the wheel.
- Yellow patches: violet-based toner neutralizes them. Yellow sits opposite violet.
- Red patches: green-based toner neutralizes them. Red sits opposite green.
- Green patches: red-based toner neutralizes them. Green sits opposite red.
A common mistake is reaching for the strongest neutralizer available.
Gloss treatment adds shine and blends tone across the whole head.
Bleach bath is for stubborn uneven lift where one section is one to two levels darker.
Step 3: Know when to stop.
Conclusion: Building a Patch-Proof Color Routine
Patchy hair color comes down to a handful of habits: clean sectioning, honest porosity checks, full saturation, and the right developer for each section. Get those right and you'll stop most patchiness before it starts.
The tools you use make those habits easier to keep. ESTL+CO builds salon-grade tint tools designed by working colorists, including stain-resistant bowls and ergonomic feathered brushes that spread color evenly.
Ready to upgrade your station? Explore the Hair Color Brushes and Hair Color Bowls from the Elegance Collection, and see how precision tools change your results.
Frequently Asked Questions
Why does my hair color turn out patchy?
Patchy hair color usually comes from three things: uneven saturation, missed sections, or porous hair absorbing pigment at different rates. If you don't saturate each strand fully or you skip sectioning, some areas get more color than others. Porosity gaps cause uneven absorption, and using the wrong developer volume can also lead to uneven lift. A strand test and proper sectioning prevent most patchiness.
Does hair porosity affect how evenly color absorbs?
Yes. High-porosity hair has a raised cuticle that absorbs pigment quickly, while low-porosity hair resists absorption. When these zones mix on one head, color grabs unevenly and looks patchy. To compensate, apply color to resistant areas first and use a porosity equalizer or filler before coloring. Always do a strand test to see how your client's hair absorbs the formula.
What tools are essential for preventing uneven hair color?
A precision tint brush with feathered bristles, a stain-resistant bowl that holds product without dripping, and sectioning clips are the basics. Feathered brushes let you control saturation and spread color evenly. Bowls with a tilted edge keep dye in place during application. These tools reduce patchy application by giving you consistent control from the first sweep to the last.
How do I fix a blotchy dye job after it has dried?
If the color is already dry, a bleach bath or color remover can lift the patchy areas, but it risks further damage. A safer first step is a toner or gloss to neutralize uneven undertones and blend the patches. For severe blotchiness, re-section and reapply color only to the under-pigmented zones, then emulsify and rinse thoroughly. Always follow with a deep conditioning treatment to restore moisture balance.
Uneven color costs you time, money, and client trust. ESTL+CO makes salon-grade tint tools built to prevent patchiness at the source, with feathered brushes for even spread, ergonomic handles for all-day comfort, and stain-resistant bowls that hold product steady. Get started with ESTL+CO and give every client a flawless, patch-free finish.