

How to Pack Hair Tools for Travel: A Pro's Guide
Table of Contents
- Step 1: Choose the Right Hair Tools to Bring
- Step 2: How to Pack Hot Hair Tools Safely for Travel
- Step 3: How to Pack Hair Brushes for Travel
- Step 4: Master Cord Management and Attachment Removal
- Step 5: Pick the Best Travel Bag for Hair Tools
- Step 6: Hair Styling Tools on a Plane: Carry-On vs Checked Bag
- Step 7: International Travel: Voltage, Plug Adapters, and Converters
- Step 8: Packing Order and Luggage Placement
- Frequently Asked Questions
Last Updated: October 9, 2026
Step 1: Choose the Right Hair Tools to Bring
The best way to pack hair tools for travel starts before you open a suitcase: decide what actually earns a spot in your bag.
At ESTL+CO, we build tools for stylists who move between chairs, studios, and clients all day.
Start by matching tools to your trip:
- Weekend trip: one multi-styler, one brush, one comb
- Week-long vacation: add a travel hair dryer and a second brush
- Work trip or event styling: bring your core kit, plus backup attachments
Ask of each tool: "Will I actually use this?" If not, leave it home. Most people pack two or three items they never touch.
Multi-Purpose Tools That Save Space
A multi-styler is the biggest space saver in any bag: one tool with swap-in attachments can dry, straighten, and curl, replacing three devices.
Here's how to think about the trade-off:
| Tool Type | Space Used | Best For |
|---|---|---|
| Multi-styler with attachments | Low | Short trips, carry-on only |
| Separate dryer, flat iron, curling iron | High | Long trips, full styling needs |
| Cordless or butane-powered tool | Low | Flights, no outlet access |
The catch? Multi-stylers often run at lower power than full-size tools. Fine for touch-ups; for a full blowout, bring the real thing.
Step 2: How to Pack Hot Hair Tools Safely for Travel
The safest way to pack hot hair tools for travel: let them cool completely, then secure the cord and cover the barrel. Heat is the top cause of travel damage to your tools and everything around them.
A hot barrel can melt nylon, scorch fabric, and warp plastic, and burn your hand hours later.
Follow this order every time:
- Unplug the tool and set it on a heat-safe surface
- Wait at least 10 to 15 minutes
- Touch the barrel with the back of your hand to confirm it's cool
- Wrap the cord loosely around the tool
- Slide it into a heat-resistant pouch or cover
Cool Completely Before Packing
"Cool" means cool to the touch, not just switched off. Some flat irons and curling irons hold heat for 10 minutes or more after unplugging.
If you're short on time, lay the tool on a counter instead of coiling it. An exposed tool cools faster than one folded into a case.
Step 3: How to Pack Hair Brushes for Travel
Packing hair brushes for travel comes down to two moves: protect the bristles and stop handles from snagging everything else. Bristles bend, and once they bend, the brush never works the same way again. Match the method to the brush type.
Match the Method to the Brush
- Boar-bristle and mixed-bristle brushes: These are the most fragile. A cloth sleeve or a zip pouch keeps bristles from crushing against clothes. Pack them bristle-side up so nothing presses down on the tufts.
- Paddle brushes: Lay them flat against the side of your bag rather than in the middle of your clothes. The wide head distributes pressure, so a flat position against a firm surface prevents warping.
- Round brushes: These are the bulkiest and the most likely to tangle with other brushes. Keep each one in its own sleeve, and separate round brushes from flat ones so the bristles don't interlock.
Clean Before You Pack
A dirty brush comes out of a bag smelling like stale product and loose hair. Cleaning takes about two minutes per brush and prevents lint, odor, and product transfer onto clothes.
- Pull loose hair out of the bristles with a comb or your fingers.
- Mix a drop of gentle shampoo in warm water.
- Swirl the bristles in the water, keeping the handle and any wooden base dry.
- Rinse the bristles under running water, bristle-side down.
- Blot with a towel and let the brush air-dry completely before it goes in the bag.
Protect the Handle and Ferrule
Handles crack and ferrules loosen when a brush is jammed against hard objects. Two habits prevent it:
- Slide each brush into a sleeve or zip pouch so the handle isn't exposed to zipper teeth or hard luggage corners.
- Pack brushes bristle-side up, and place them on top of soft clothing rather than under heavy tools.
A quick comb-through and rinse before you leave means a brush that works on day one instead of one smelling like last week's styling product.
Step 4: Master Cord Management and Attachment Removal
Cord management is where most packing jobs fall apart. A tangled cord wastes space, kinks over time, and can crack the wiring inside. The fix takes a minute per tool.
Try this routine:
- Unplug the tool and let it cool
- Loosen the cord fully, then wrap it in a figure-eight around your hand
- Secure the loop with a velcro tie or a soft hair band
A figure-eight wrap stops the cord from twisting back on itself. That single habit adds years to a tool's life.
Remove Detachable Attachments
Any detachable attachment should come off before packing. Barrels, concentrator nozzles, diffusers, and brush heads add bulk and can snap under pressure.
Store each attachment in a small pouch or zip bag, labeled if you carry several. When you land, everything goes back together in seconds instead of a ten-minute hunt.
Step 5: Pick the Best Travel Bag for Hair Tools
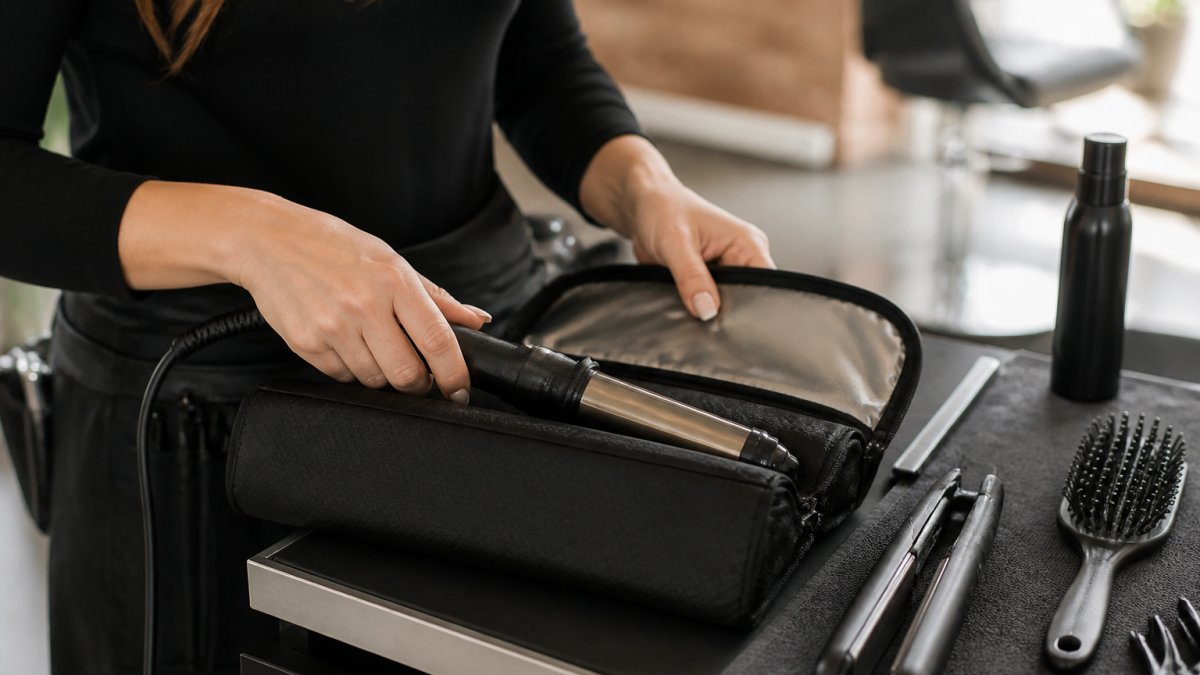
The best travel bag for hair tools has a heat-resistant lining, separate compartments, and enough structure to stop tools shifting. A dedicated case beats a plastic bag, which traps heat and offers no padding.
What to Look For
- Heat-resistant lining: Look for a lining rated to withstand residual heat, typically a silicone-coated fabric or a quilted heat-resistant layer. This is the single most important feature if you ever pack a tool that isn't fully cool.
- Separate compartments: One section for tools, one for cords and attachments, and ideally a small pocket for accessories like clips and ties. Separation prevents cords from tangling with bristles.
- Structure: A firm outer shell or padded walls keep tools from bending under the weight of clothes and shoes. Soft pouches protect against scratches but not against crushing.
Materials and What They Do
| Material | Best For | Trade-off |
|---|---|---|
| Silicone-coated fabric | Heat resistance, easy wipe-down | Can feel stiff and bulky |
| Quilted nylon | Lightweight padding | Less heat protection than silicone |
| Hard-shell case | Fragile tools, checked bags | Heavier, takes up more space |
| Neoprene sleeve | Compact carry-on packing | Minimal crush protection |
| Canvas roll | Brushes and attachments | No heat resistance |
A dedicated case does two jobs: it protects your tools, and it protects your clothes from heat, oil, and product residue. One leaky product bottle next to an unprotected tool can stain a whole outfit.
How to Use the Case Well
- Put the heat-resistant pouch or cover on the tool first, then slide it into the case. Double-layering gives you a margin of safety if a tool is still slightly warm.
- Keep cords in their own compartment so they don't wrap around brush bristles.
- Store attachments in a small zip bag inside the case, labeled if you carry several.
That's the full routine. Choose fewer tools, cool them completely, manage the cords, and give everything a proper home in your bag.
Step 6: Hair Styling Tools on a Plane: Carry-On vs Checked Bag
Hair styling tools on a plane follow one main rule from the TSA: most heated styling tools are allowed in both carry-on and checked bags, but butane-powered tools are not. Always check the current TSA rules on hair styling tools before you fly, since rules can change.
Here's the breakdown:
| Tool Type | Carry-On | Checked Bag |
|---|---|---|
| Flat iron, curling iron, hair dryer | Allowed | Allowed |
| Cordless rechargeable tool | Allowed | Allowed |
| Butane-powered tool | Not allowed | Not allowed |
| Spare lithium batteries | Carry-on only | Not allowed |
A few practical notes:
- A hot tool in a carry-on can be flagged at security, so let it cool fully before the checkpoint.
- Checked bags get thrown around. Use a hard case or padded pouch for anything fragile.
- Keep your most expensive tool in your carry-on if you can. Checked luggage gets lost.
The carry-on versus checked bag choice comes down to value and fragility. Cheap tools can ride in the hold. Your best flat iron should stay with you.
Step 7: International Travel: Voltage, Plug Adapters, and Converters
Voltage is the detail that ruins trips. Most U.S. styling tools run on 120 volts; many countries run 220 to 240.
Here's how to sort it out before you go:
- Check the label on your tool for "dual voltage" or "120V/240V"
- Dual voltage tools work abroad with just a plug adapter
- Single voltage tools need a power converter, not just an adapter
Many newer dryers and stylers are dual voltage; older or high-power tools often aren't.
The U.S. Department of State travel guidance recommends checking plug and voltage requirements for your destination before you leave. It takes two minutes and saves a ruined tool.
Step 8: Packing Order and Luggage Placement
Packing order decides whether your tools survive the trip: heavy tools at the bottom, soft items around them, nothing fragile where a suitcase corner can crush it.
Use this order:
- Lay heavy tools flat on the bottom of the bag
- Place the storage case in the center, wrapped by soft clothing
- Tuck cords and attachments into gaps
- Put brushes on top, bristle-side up
- Keep a heat-resistant pouch within reach for last-minute packing
For carry-on bags, place your tool case near the top for easy security access. For checked bags, center the case and surround it with clothes.
Here's a quick checklist you can reuse for every trip:
- Tools unplugged and fully cool
- Attachments removed and bagged
- Cords wrapped in a figure-eight and tied
That's the full routine. Choose fewer tools, cool them completely, manage the cords, and give everything a proper home in your bag.
Frequently Asked Questions
Can I bring hair tools on an airplane?
Yes, you can bring hair tools on an airplane in both carry-on and checked bags. The TSA allows hair dryers, flat irons, curling irons, and hot brushes in carry-on luggage. However, butane-powered tools like cordless curling irons are only allowed in checked bags if the heating element is removed. Always check your airline's specific rules before flying, as policies can vary.
Should I pack hair tools in my carry-on or checked bag?
Pack hair tools in your carry-on if they are expensive or fragile, since checked bags can be mishandled. For butane-powered tools, you must pack them in checked bags with the heating element removed. If you need to use your tools immediately after landing, keep them in your carry-on. Otherwise, checked bags free up space for other items. Always follow TSA guidelines for both options.
How can I keep hair tool cords from tangling in my luggage?
To prevent tangling, wrap each cord loosely around your hand and secure it with a velcro tie or hair elastic. Avoid wrapping cords tightly around the tool, as this can damage the wiring. Place each tool in its own heat-resistant pouch or case. For extra organization, use a dedicated travel bag with separate compartments. This keeps cords separate and ready to use without knots.
What is the best travel bag for hair tools?
The best travel bag for hair tools has heat-resistant lining, separate compartments for each tool, and a durable exterior. Look for bags with elastic loops to secure cords and attachments. A hanging toiletry-style bag works well for easy access. Any bag with these features will protect your tools and keep them organized during travel.
Packing hair tools well takes a system, not luck. A stylist's kit has to survive constant packing, travel, and setup, which is exactly why ESTL+CO builds tools with ergonomic design and stain-resistant materials for professionals on the move. Our feathered brushes and tint bowls are made for precision and performance, trip after trip. Get started with ESTL+CO and pack a kit that works as hard as you do.