

How to Improve Hair Color Precision: 7 Steps for Pros
Table of Contents
- Why Hair Color Precision Starts With Assessment
- Hair Color Sectioning Techniques That Keep Application Clean
- How to Apply Hair Color Evenly Across the Head
- Foil Placement for Highlights and Foil Techniques
- Best Tools for Balayage and Foil Techniques
- Gray Coverage, Root Touch-Ups, and Color Contouring
- Color Correction and Troubleshooting Precision Problems
- Safety, Patch Tests, and Scalp Considerations
- Frequently Asked Questions
Last Updated: October 8, 2026
Why Hair Color Precision Starts With Assessment
Hair color precision means controlling where color goes, how much lift it achieves, and how cleanly it processes, so the result matches the plan you made before mixing a single bowl. At ESTL+CO, we build tools for colorists who treat every application as a measured decision, not a guess.
Assessment comes first because color reacts to what's already on the hair. Skip it, and you're correcting instead of creating.
Reading Natural Level and Underlying Pigment
Natural level is the starting depth of the hair, ranked one to ten. Underlying pigment is the warmth hair reveals when lightened.
Those two facts decide your shade, developer, and timing.
Occupational Safety and Health Administration guidance on chemical safety in salons treats hair dye as a chemical exposure risk, which is one more reason to plan before you pour.
Porosity, Texture, and Chemical History
Porosity is how easily hair absorbs and releases moisture and color. High-porosity hair grabs pigment fast and can look muddy.
Fine hair lifts quickly and can turn brassy; coarse hair takes longer and may need a stronger developer.
Chemical history is the third piece. Box dye, previous bleach, and relaxers all change how new color behaves. A strand test tells you more than any guess.
Hair Color Sectioning Techniques That Keep Application Clean
Good sectioning delivers even coverage without overlap. The cleaner your sections, the more control you have over every sweep of color, and the more repeatable your results become.
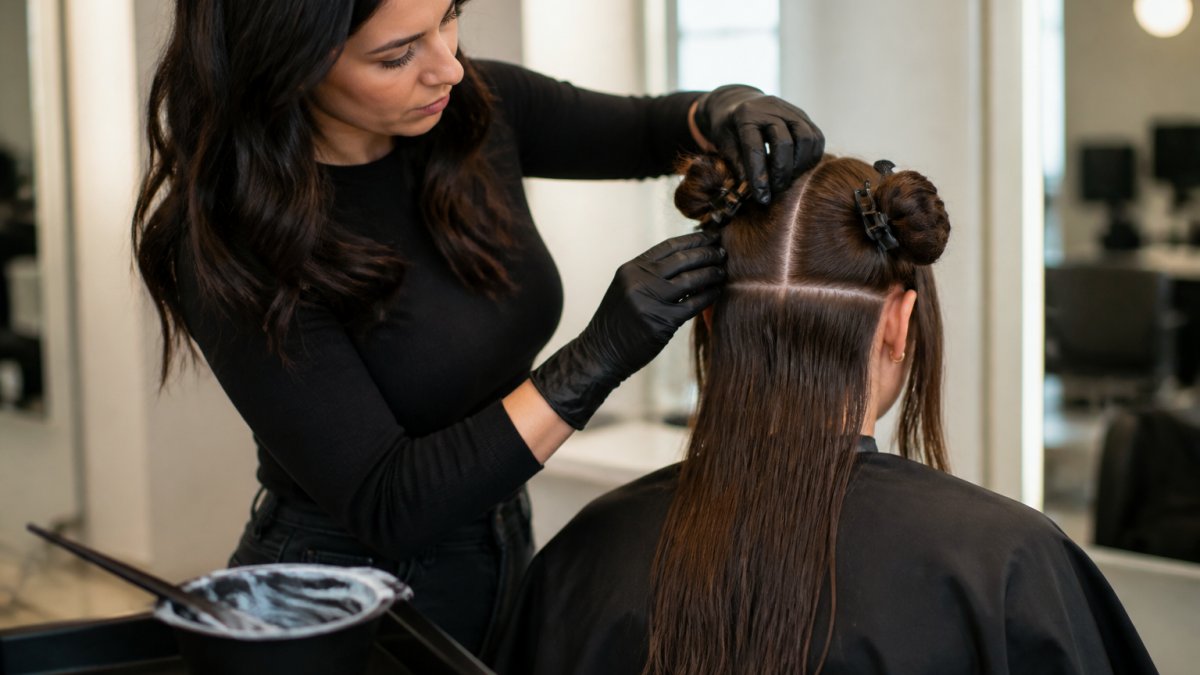
Start by combing the hair fully dry and tangle-free. Wet hair stretches and lies differently, so sections won't hold their shape.
How Thin Should Sections Be?
Thin sections are the single biggest upgrade most colorists can make. Section width should match the job, not a single universal number:
- Full coverage and gray coverage: one-eighth to one-quarter inch. Gray hair is often more resistant and coarser, so thin sections guarantee the color reaches every strand.
- All-over color on fine hair: one-quarter inch. Fine hair saturates fast, so you can move quickly without overloading.
- Root touch-ups: one-quarter to one-half inch. You only need to reach the regrowth, so slightly larger sections are efficient.
Thin sections give you even saturation from root to end, less chance of missing a patch, and cleaner foil placement with no bunching. Patchy results usually trace back to sections too thick to see the scalp through.
Clipping and Anchor Points for Repeatable Results
Anchor points are the fixed spots where you clip each section, so every part of the head gets treated the same way. Pick them before you start, and write them down if you track client formulas.
A simple approach:
- Divide the head into four quadrants using a center part and a part from ear to ear over the crown.
- Clip each quadrant at a consistent height, for example, one clip at the crown and one at the nape on each side.
- Work one quadrant at a time, front to back, and finish a quadrant before you unclip the next.
Repeatable anchors mean a client who returns in six weeks gets the same coverage pattern, and they cut application time because you are not re-deciding where to start on every head.
A Step-by-Step Precision Application Workflow
Sectioning is the first stage of a workflow, not a standalone step. Most precision failures happen because colorists skip a checkpoint, not because they lack skill. Here is the order that keeps you in control:
- Assess and strand test. Confirm natural level, underlying pigment, porosity, and chemical history. Test on a hidden section before you commit to a full head.
- Map the sectioning plan. Decide quadrant order, subsection width, and anchor points based on the goal, root coverage, gray blending, highlights, or all-over color.
- Mix and label. Mix developer and color to the manufacturer's ratio, and note the start time on the bowl or a timer. Developer volume sets your lift: ten volume deposits with little lift, twenty volume lifts roughly one to two levels, and thirty or forty volume lifts more but raises damage risk.
- Apply in a fixed order. Work from the area that processes longest to the area that processes shortest. For a root retouch, start at the back and work forward so the front, which clients see first, gets your freshest attention.
- Check saturation as you go. After each subsection, look at the strand from root to end. If you can still see dry hair or a light patch, reload and re-sweep before moving on.
- Set timing checkpoints. Do not wait until the end to check. Look at the color at roughly the halfway mark and again near the end of the processing window, and set a timer for every service.
- Rinse and evaluate. Rinse thoroughly, then assess tone and evenness in daylight before you decide whether a toner is needed.
How to Apply Hair Color Evenly Across the Head
Even application comes down to four controls: developer strength, product quantity, processing time, and saturation checks as you work. Get those right and most banding problems disappear before they start.
Developer Strength, Lift, and Processing Time
Developer volume controls lift. Ten volume deposits color with little lift; twenty volume lifts roughly one to two levels; thirty or forty volume lifts more but raises damage risk.
Processing time is not a suggestion. Color keeps working past the recommended window, and over-processing causes uneven tone.
A practical rule: match the developer to the goal, not to impatience.
How Much Product to Use Per Section
Product quantity is the control most colorists never measure, and it is the reason one side of the head processes differently from the other.
- Root retouch: a bead of color roughly the width of your brush, applied in one continuous sweep per subsection.
- All-over color: enough to fully coat the strand from root to end with no visible dry spots, reload between subsections rather than stretching one load.
- Foils: a thin, even layer. Too much product bleeds past the foil edge; too little leaves the strand under-saturated.
If you find yourself scraping the bowl at the halfway point, you mixed too little. Mixing a little extra costs less than a patchy result.
Checking Saturation Mid-Application
Do not wait until the rinse to find out whether you covered everything. Check saturation after each subsection:
- Lift the strand and look at it against the light. Dry, uncoated hair catches light differently than saturated hair.
- Run a gloved finger along the strand. If it drags, the section is under-saturated.
- Pay extra attention to the hairline, the nape, and around the ears, the three spots most often missed.
Avoiding Overlap and Banding
Overlap happens when you reapply color to hair that already has it, leaving a darker band that shows up in the final rinse.
A few habits that prevent it:
- Keep your brush angle consistent as you sweep.
- Load the brush the same amount each time.
- Work in thin sections so you always see the line you're painting to.
The fix for overlap is prevention, not correction. Once a band forms, you're removing pigment, not adding it.
Foil Placement for Highlights and Foil Techniques
Foil placement decides the pattern your highlights make. Choose the method that matches the look your client wants, not the fastest one.
Balayage vs. Foil: Choosing the Right Method
Balayage is a freehand painting technique that creates a soft, lived-in grow-out. Foil creates sharper, brighter lift because the foil traps heat and speeds processing.
| Method | Best For | Application Style | Grow-Out |
|---|---|---|---|
| Balayage | Soft, natural blends | Freehand painting | Very forgiving |
| Foil | Bright, defined highlights | Sectioned and wrapped | More visible roots |
| Ombre | Dark-to-light gradient | Painted or foiled ends | Grows out at the root |
Choose balayage for clients who want low maintenance. Choose foils when you need maximum lift or a crisp line.
Best Tools for Balayage and Foil Techniques
The best tools for balayage and foil techniques give you control over placement and hold up to daily use. Precision comes from your hands, but your tools either support it or fight it.
A feathered brush spreads color smoothly and helps you blend without harsh edges. [ESTL+CO's Hair Color Brushes](https://estlco.com/products/hair-color-brushes) are built with a wide feathered tip and a tapered point for neater sections, plus a wide base that cuts hand tension.

For foils, a no-slip design keeps hair in place while you work. The Asymetrie Collection foils are 12 microns thick, pre-cut and pre-folded at 5 by 11 inches, with an embossed texture that holds hair steady.

And a bowl that stays put matters more than people admit. ESTL+CO's Hair Color Bowls have a U-shaped cutout that holds your brush between sweeps and a tilted edge that keeps dye in the bowl.

Gray Coverage, Root Touch-Ups, and Color Contouring
Gray coverage and root touch-ups are where precision shows most. Gray hair is often more resistant, so it needs full saturation and a careful shade match.
Shade Placement for Light and Shadow
Color contouring uses light and shadow to shape the face: lighter shades where light naturally hits, darker shades where you want depth.
Where to place each:
- Lighter shade: around the face and on the top layers
- Darker shade: at the roots and underneath sections
- Blending zone: where the two shades meet, softened with a feathered brush
This is also called shade placement, and it's the difference between flat color and color with dimension.
Color Correction and Troubleshooting Precision Problems
Most precision problems trace back to four causes: uneven saturation, overlap, wrong developer, or skipped assessment. Here's how to fix each.
| Problem | Likely Cause | Fix |
|---|---|---|
| Banding | Overlap on previously colored hair | Re-section and blend the band with a lower developer |
| Patchy coverage | Sections too thick | Reapply in thinner sections on the missed areas |
| Brassy tone | Underlying pigment not neutralized | Use a toner matched to the exposed warmth |
| Muddy ends | High porosity grabbing too much pigment | Pre-treat ends and shorten their processing time |
Correct from the least damaging option first. A toner fixes more than people expect. Only reach for lightener when nothing else will work.
Safety, Patch Tests, and Scalp Considerations
A patch test checks for an allergic reaction before you apply color to the full head. It's a small step that prevents a serious problem.
Follow the manufacturer's instructions for timing, and never skip it on a first-time client or anyone with a known sensitivity. American Academy of Dermatology information on contact dermatitis explains how allergic reactions to hair dye can develop even after years of use.
Scalp considerations matter too. Avoid applying color directly to broken or irritated skin, and keep developer off the scalp when the service doesn't require it.
Frequently Asked Questions
How can I apply hair color more precisely?
Start with a clean assessment of natural hair color level, porosity, and chemical history. Section the hair into quadrants using consistent partings, keep subsections thin (about a quarter inch), and apply color with a feathered brush that lets you control saturation at the root and mid-lengths. A stain-resistant tint bowl with a U-shaped cutout keeps your brush steady between sweeps, which reduces drips and uneven patches. Patch test 48 hours before every service and strand test when changing developers or lightening more than two levels.
How do professional colorists section hair for accurate color placement?
Most colorists divide the head into four quadrants using a center part and a part from ear to ear across the crown. Each quadrant is then split into horizontal or diagonal subsections no thicker than a quarter inch. Diagonal partings help color flow naturally with the hair's fall, which matters for balayage and color contouring. Clipping each section out of the way keeps the canvas clean so you can see exactly where the previous subsection ended and avoid overlap.
What tools help improve precision when applying hair color?
A wide feathered tint brush gives you control at the root and smoother saturation through mid-lengths. Ergonomic handles with a wide base reduce hand fatigue during back-to-back clients. Stain-resistant bowls with a tilted edge keep dye from spilling and hold the brush between sweeps. For foils, pre-cut, pre-folded sheets with an embossed no-slip texture stay stable at the root and speed up placement. Each tool should support the same goal: consistent, repeatable application.
How do you get clean, even balayage highlights?
Balayage precision comes from controlling saturation and placement. Work on dry hair so you can see the natural fall and where the client's color already sits. Use a feathering motion with the brush, starting mid-strand and sweeping downward, then go back and blend the root area with less product. Keep subsections thin and consistent. A no-slip foil or film underneath keeps the painted section stable while you work. Processing time and developer volume should match the lift you need, not a fixed rule.
Color precision breaks down when your tools fight your hands. ESTL+CO makes salon-grade tint tools designed by a pro, for pros, so every sweep lands where you intend. Our stain-resistant bowls, ergonomic feathered brushes, and no-slip foils are built to hold up to a full day of color work. Get started with ESTL+CO and bring measurable control to every application.