

Prevent Hair Damage During Bleaching: A Pro Guide
Last Updated: October 22, 2026
Quick Summary
To prevent hair damage bleaching, run a strand test before treating your entire head, choose the appropriate developer volume for your hair type, apply bleach only to new growth without overlapping previously lightened hair, and follow the manufacturer's processing time exactly. Rinse thoroughly with lukewarm water, use sulfate-free shampoo, and apply deep conditioning or bond-building treatment immediately after.
- A strand test takes 15 minutes and prevents catastrophic damage to the entire head.
- Use 10 volume for fragile hair (45-60 minutes), 20 volume for healthy virgin hair (20-30 minutes), or 30 volume for darker hair (15-25 minutes).
- Apply bleach from mid-lengths to ends first, then roots last, because roots process faster from scalp heat.
- Never extend processing time beyond the manufacturer's recommendation; do a second gentle session later instead.
- Use a deep conditioner 2-3 times per week for the first month after bleaching, alternating between protein and moisture treatments.
Table of Contents
- Assess Your Hair Before You Bleach
- How to Bleach Hair at Home Without Damaging It
- Hair Bleach Application Tools and Sectioning
- How to Prevent Breakage During Bleach Retouch
- Rinse, Shampoo, and Immediate Aftercare
- How to Treat Damaged Hair After Bleaching
- Conclusion
- Frequently Asked Questions
Assess Your Hair Before You Bleach
Most damage that occurs when you prevent hair damage bleaching comes from skipping assessment, not from bleach itself. Compromised hair reacts differently than virgin hair, so a strand test isn't optional.
Run a Strand Test
A strand test is a small-scale bleaching trial before treating the entire head. Take a section from underneath, apply your bleach mixture, and process for the exact time you plan to use on the full head.
The strand test also tells you if the hair will tolerate bleach at all. Research shows that excessive bleaching causes loss of the hair cuticle layer, exposing the cortex and significantly altering hair's internal microstructure, so knowing your starting point is critical.
Document the results, developer volume, processing time, and how the hair looked after rinsing, as your reference.
Evaluate Hair History and Damage Level
Ask your client about previous color treatments, heat styling, and chemical services.
Run your fingers through the hair: healthy hair feels smooth and elastic, while damaged hair feels rough, snaps easily, and lacks bounce.
Virgin hair can handle stronger developer; previously bleached hair needs gentler treatment; heat-damaged or chemically processed hair needs the most conservative approach, weaker developer, shorter processing time, and intensive conditioning before and after bleaching.
How to Bleach Hair at Home Without Damaging It
At-home bleaching carries more risk than salon bleaching because no professional is watching your hair. Most damage happens for predictable reasons: developer too strong, bleach sitting too long, uneven application, or hair already compromised. The protocol below removes those variables one at a time.
Choose the Right Developer Volume
Developer volume determines how quickly bleach opens the cuticle and lifts pigment. Higher volumes process faster but are harsher. The right choice depends on your starting color, hair history, and how much lift you need.
Use this framework as a starting point:
- 10 volume: Gentle processing for already-lightened or very fragile hair. Processing takes longer (45-60 minutes), but damage risk is lowest.
- 20 volume: Standard for most at-home bleaching on virgin hair. Processing time is typically 20-30 minutes. Works without excessive damage on healthy hair.
- 30 volume: Stronger lift for darker hair or stubborn pigment. Use only on healthy virgin hair. Processing time is 15-25 minutes. Risk of damage increases significantly.
Choose the lowest volume that still achieves your target lightness.
Prepare Your Hair and Scalp
Don't wash your hair for 48 hours before bleaching. The natural oils protect your scalp and hair. On bleaching day, apply a barrier cream around your hairline to protect skin from staining and irritation.

Comb through gently while dry, wet hair breaks more easily. If hair is very dry or damaged, apply a light conditioning treatment to the ends (not the roots, where bleach needs to grip), let it sit 10 minutes, then rinse lightly.
Run a Timing and Application Safeguard
Before mixing a full batch, strand-test a small section from underneath with the exact mixture you plan to use.
During the full application, set a timer for the manufacturer's recommended processing time and don't extend it to chase more lift.
Apply bleach from mid-lengths to ends first, then roots last, roots process faster from scalp heat, so applying them last prevents over-processing.
Know the Warning Signs
A little tingling is normal; burning is not. If you feel burning, stinging, or a sensation that worsens rather than settles, rinse immediately with lukewarm water and wash with a gentle shampoo.
Watch for hair warning signs too: gummy or mushy hair while wet, stretching like chewing gum without returning, or breaking when gently pulled means the hair is over-processed.
Decide Whether At-Home Bleaching Is Appropriate
At-home bleaching suits healthy virgin hair that needs modest lift, and people willing to strand-test, follow instructions exactly, and stop when the hair says stop. It's a poor fit for previously bleached, chemically relaxed, permed, or repeatedly colored hair, where overlap and over-processing are hard to avoid without a professional's judgment.
Hair Bleach Application Tools and Sectioning
The tools you use matter more than most colorists realize. A cheap brush won't distribute bleach evenly, and a regular bowl won't hold the mixture properly.
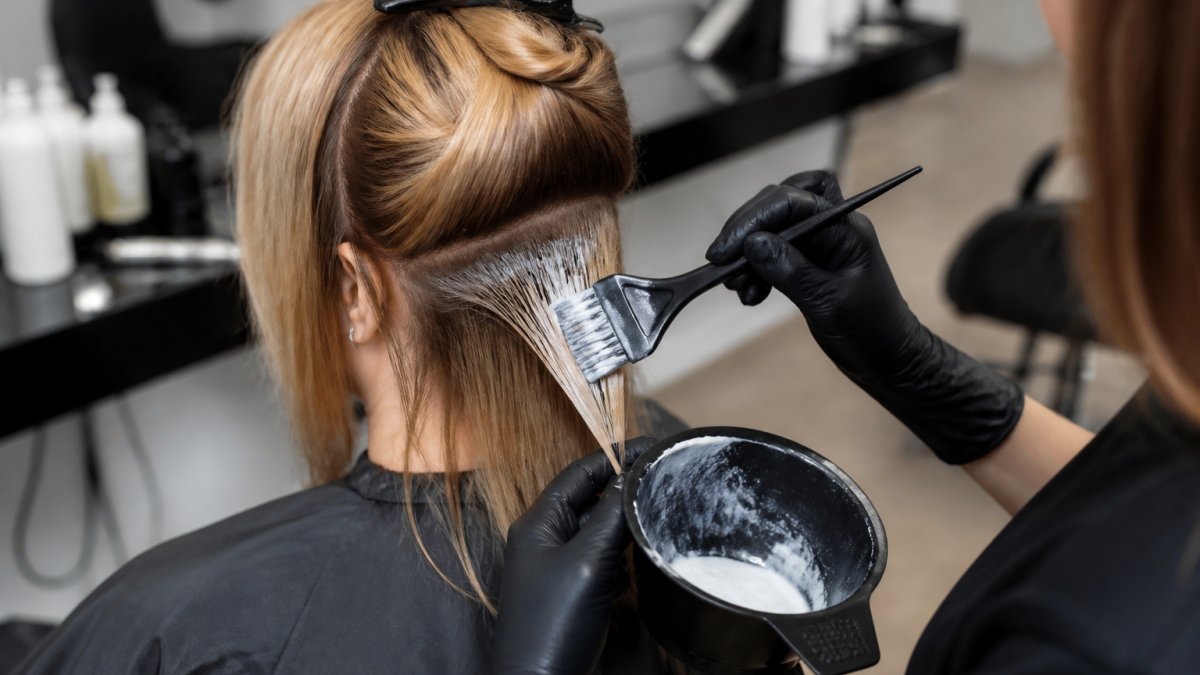
Section Your Hair Properly
Divide hair into 4-6 sections depending on thickness and length, using clips to keep them separated. This prevents missed spots and ensures even processing. Start at the back and work forward, the back processes faster because it's closer to body heat.
Clip the rest of the hair up and create subsections about 1 inch wide. Thin subsections mean bleach reaches every strand; thick ones cause patchy results and uneven stress.
Work methodically through each subsection, applying bleach from mid-lengths toward the ends first, then roots last (roots process faster due to scalp heat).
Use Professional-Grade Application Tools
A feathered brush distributes product smoothly without clumping, while a regular paintbrush leaves streaks and uneven coverage. ESTL+CO's feathered brushes are ergonomically designed to prevent tension and pinching that other brushes leave you with cramped fingers and deliver precise color placement across subsections.
The bowl matters too. A regular mixing bowl slides around and can spill, while a professional color bowl has a U-shaped cutout that holds your brush between sweeps.

How to Prevent Breakage During Bleach Retouch
Retouch bleaching is where most damage happens. You're applying fresh bleach to new growth while previously lightened hair sits in the bowl. If you're not careful, the old bleached hair gets over-processed, loses elasticity, and snaps off.
Avoid Overlapping Bleach on Previously Lightened Hair
This is the single most important rule for preventing breakage. Previously lightened hair is more porous and processes faster.
Apply bleach only to the new growth at the roots. Use a thin, precise line.
For balayage and foil techniques, ESTL+CO's Asymetrie Collection foils prevent bleach from spreading to surrounding hair.

Monitor Processing Time and Scalp Safety
Set a timer, don't estimate. Processing time is the difference between beautiful lightened hair and broken, damaged hair.
Watch your client's scalp too. If they report burning or intense itching, rinse immediately. A little tingling is normal. Burning is not.
Don't process longer than recommended just to get more lift.
Rinse, Shampoo, and Immediate Aftercare
How you rinse and shampoo after bleaching determines whether the hair stays strong or becomes fragile.
Rinse with lukewarm water (not hot, heat opens the cuticle more and can cause additional damage) until the water runs clear.
Use a sulfate-free shampoo, sulfates strip moisture and protein from bleached hair, making it more prone to breakage.
Apply a deep conditioner or bond-building treatment immediately after shampooing.
How to Treat Damaged Hair After Bleaching
If bleaching has already damaged your hair, you cannot reverse the structural damage. Bleach permanently alters the hair's internal structure, and no product regrows a cuticle or re-fuses a broken bond. What you can do is prevent further damage, improve how the hair feels and behaves, and buy time while new growth comes in.
Understand What Bond Builders Can and Cannot Do
Bond-building treatments are the most marketed category in post-bleach care, and the most misunderstood. They generally work by temporarily reinforcing or reconnecting some of the bonds that bleaching breaks.
Think of bond builders as a support, not a repair. They help hair tolerate the weeks after bleaching and reduce further breakage from brushing and heat, but they are no substitute for gentle handling and do not make it safe to bleach again sooner than the hair is ready.
Build a Balanced Reparative Regimen
A reparative regimen combines deep conditioning, protein treatments, and protective styling.
Alternate protein and moisture treatments. Protein temporarily fills gaps and adds strength; moisture hydrates and improves flexibility. Your hair needs both.
Apply treatments to the mid-lengths and ends, not the roots, and leave on for at least 15-20 minutes.
Manage Heat Styling and Washing Frequency
Minimize heat styling for at least 2 weeks after bleaching, hair is most fragile immediately after. Blow dryers, flat irons, and curling irons cause additional damage. Air dry when possible; if you must use heat, use a heat protectant spray and keep the temperature low.
Wash less frequently. Every wash opens the cuticle and risks more moisture loss.
When you do wash, be gentle. Don't scrub your scalp aggressively. Don't pile your hair on top of your head.
Sleep on a silk or satin pillowcase. Cotton creates friction that causes breakage; silk reduces friction and helps hair stay intact while you sleep.
Plan a Realistic Re-Bleaching Schedule
There is no fixed calendar for when it is safe to bleach again. Timing depends on how the hair feels, how much new growth you have, and whether previously lightened hair can be kept out of the way during a root touch-up.
Before any re-bleach, run a strand test again. If the strand feels gummy, stretches without springing back, or breaks easily, the hair is not ready. If unsure, a professional assessment is worth the cost of a consultation.
Conclusion
The best ways to prevent hair damage bleaching come down to three things: assessment, precision, and aftercare. Run a strand test. Choose the right developer. Apply bleach carefully without overlapping.
The tools you use matter. Professional-grade brushes and bowls give you control and precision cheap tools can't match.
Start with assessment, not assumptions. Protect your client's scalp. Process with intention. Rinse thoroughly. Condition aggressively. Your hair, and your clients' hair, will thank you.
Frequently Asked Questions
How can you prevent hair breakage during bleaching?
Prevent breakage by assessing your hair's condition before bleaching, conducting a strand test, using the appropriate developer volume for your hair type, and avoiding overlapping bleach on previously lightened sections. During application, use professional tools designed for precision to reduce unnecessary stress on the hair cuticle and cortex.
What is the best way to treat damaged hair after bleaching?
After bleaching, rinse thoroughly with cool water and use a sulfate-free shampoo to prevent further cuticle damage. Begin a reparative regimen immediately with deep conditioning treatments and bond-building products designed to restore protein and moisture. Limit heat styling and wash your hair only 2-3 times per week using gentle handling techniques.
Should you bleach hair that is already damaged?
No. If your hair shows signs of significant damage such as split ends, excessive breakage, or loss of elasticity, wait until you've completed a reparative regimen before bleaching. Bleaching already-compromised hair accelerates damage to the hair cuticle and cortex. If you must bleach damaged hair, use the lowest developer volume possible, reduce processing time, and apply a protective barrier cream around the scalp to minimize additional stress on weakened strands.
How often can you safely bleach your hair?
For root touch-ups, bleach only the new growth, never overlapping previously lightened hair. Always assess your hair's condition with a strand test before scheduling your next bleach service to ensure it can safely withstand another chemical processing.
